Category: Weekly Reflections

Prodigy

For this weeks’ reflection, I decided to do mine on the game Prodigy. Prodigy is an educational game where students are wizards and they are engaged in either Math or English Battles. These math questions that are asked on Prodigy adapt to where your student needs more practice. These Math questions can start from a grade 1 level and they can go all the way up to grade 8. The English questions start at a grade 1 level and they go up to a grade 5 level. Teachers are able to track their students progress and receive weekly learning reports to help the teacher identify areas of struggle for the whole class or specific students.

I decided to start playing this game, and I found it to be very fun and I could see why students would like this game and want to play it all the time. I chose to only play the Math battles and not the English battles so my perspective is only going to be focusing on the math portion of this game. Throughout the class, I kept playing Prodigy and I learned how easy it could be and how motivating it could be for students to learn or even review Math. As I said before, in Prodigy you are a wizard, which you get to customize, and you get to walk around an island while you battle other characters. Once you have completed the island that you are on, you get to move to a different island. Throughout your time battling, your characters will be able to get pets and they will be able to level up so that they are more powerful in their battles. At the beginning of this game, I thought that I was not going to enjoy this game and I thought that I wouldn’t be learning anything. But, while I was playing, I started to like the game more and more. Additionally, I could see how this would be super beneficial for students to review topics. Overall, I enjoyed my experience playing this game!

By playing Prodigy myself, this allows me to understand what students experience. This will help me in my future career by understanding games that students would enjoy that are both motivating and engaging. Additionally, allowing myself to explore of Prodigy has helped me be more informed and to create decisions on when I think it is appropriate to use gamification in my future classroom. This experience also shows me the effectiveness of gamification in a classroom and by getting rewards and levelling up throughout the game makes it feel more like play and less like work. My experience with Prodigy helps me analyze from a teachers perspective. Something that I have considered when playing this game, is why certain methods work better for some students than others. When I was playing Prodigy, this shows my interest to find ways to engage my future students and I realized throughout this process that not every student will be engaged in the same way other students will be. I figured this out through my cohort, some of us really liked playing Prodigy while others did not enjoy it at all.

In the future, I would allow my future students to use Prodigy, but only when we would have free time on the computer. I do not think Prodigy asks enough questions for it to be a lesson for Math class. I could also see myself using Prodigy in my future class if there was ever a substitute teacher. I would leave Prodigy as an option if the substitute teacher was not comfortable with teaching what I had planned for the students math lesson. Something that I would also do to decide whether or not I would want to incorporate Prodigy into my class would be to get the students opinions and feedback on the game. Click the image to get a link to my Screencastify video!

I did a little Screencastify video on Prodigy where I take you through what the math section looks like. I also did one battle so you can see roughly how many math questions you get asked and what it is like when you get a question wrong. I did all of my editing for this video on iMovie on my laptop. As you can see from when I was playing, when you mess up on a question, it does not explain to you the steps you should take to fully answer the question and it also does not give you a second chance at answering the question.

What Prodigy has to offer teachers:

  1. Differentiated learning: Prodigy automatically adapts questions to the students performance on the questions. This allows teachers to provide different instruction without creating separate lessons for those students who are either behind or the students who are advanced.
  2. Student engagement through gamification: This gamified experience makes learning feel like play which can improve engagement and students results.
  3. Progress tracking: Prodigy provides teachers with each students progress. Teachers can receive weekly reports that focuses on individual student progress or the whole class progress. This allows teachers to see areas where students might be struggling or excelling.
  4. Goal Setting: On Prodigy, teachers can set specific goals and focus on certain Math skills and concepts.
  5. Rewarding system: The game has a rewarding system which includes levelling up and collecting items in the game like pets. These rewarding systems can help teachers by increasing students engagement and motivation.

What are some of the benefits to gamifying a subject like math?

  1. The position that students may feel towards the subject math might make them feel less anxious or redundant. This games transforms the material into something more approachable. This also allows personalized learning paths which will eventually over time build students confidence.
  2. Increased Engagement and Motivation: Lots of students these day like to be on screens and playing games. Therefore, allowing students to use Prodigy, will make them feel like they are playing a game and not doing school work.
  3. Prodigy gives immediate feedback which allows students to see where they went wrong and to adjust their thinking. If the student has no idea where they went wrong, the teacher is there to help them critically think on where they felt they went wrong.

What are some of the negatives or pitfalls to be aware of?

  1. I think a negative about Prodigy is that there aren’t many math questions that you get asked. So personally, I would not have this in my future classroom unless it was going to be used for a review at the beginning, middle or end of the year, and I think the only time I would use it would be if I was giving my class free time on the computers.
  2. Students might rush through the questions rather than taking the time to fully understand Mathematical concepts.
  3. There might be frustration when the students who find math challenging play because they will not level up or earn rewards as fast as other students who succeed.
  4. Increase of screen time which can affect focus and other health problems. Being on technology devices may also cause a distraction in learning.

There are definitely more positives and negatives on Prodigy or even gamification itself so that is something to be aware of. Gamification is going to be getting more popular in the future so I think this was super beneficial to get to play a couple educational based games.


SD#5 Design Lab

What Happened?

This week for our Technology class(EDCI 366), we went to the School District #5 Design lab which is at Kootenay Orchards Elementary School and it’s ran by Ryan Mckenzie. Ryan not only showed us around in his space, but he also brought out a whole bunch of his resources and let us play around with them. Before we got to play with his resources, Ryan showed us some videos from classes that he has worked with. What I saw in these videos was when allowing students to have these technology resources, they only think that they are playing around but there are many other factors that play a role while you play with these resources. Some of these factors are critical thinking, collaboration, increase confidence with hands on learning, digital literacy, communication (explaining their ideas, explain their process), problem solving, and creativity. Ryan also showed us the SD#5 website and how the design lab has its own section! This link would be super beneficial to use if your own child is in SD#5 or if you are going to be teaching in SD#5. I honestly did not have any expectations going into the design lab and holy was I ever blown away on how many cool activities Ryan had in his lab.

Design Lab Features:

This design lab had so many cool and amazing features that students get to work with. There was everything from a laser cutter, a 3D printer, a green screen wall (I did not capture of picture of this), to train models you could build, to Makedo tools, to Scrib3d 3D pens, VR headsets, and lastly, there was many different robots you could have played with (I also did not get a picture of these). I took a couple pictures, so you can view them down below!

3D printer:

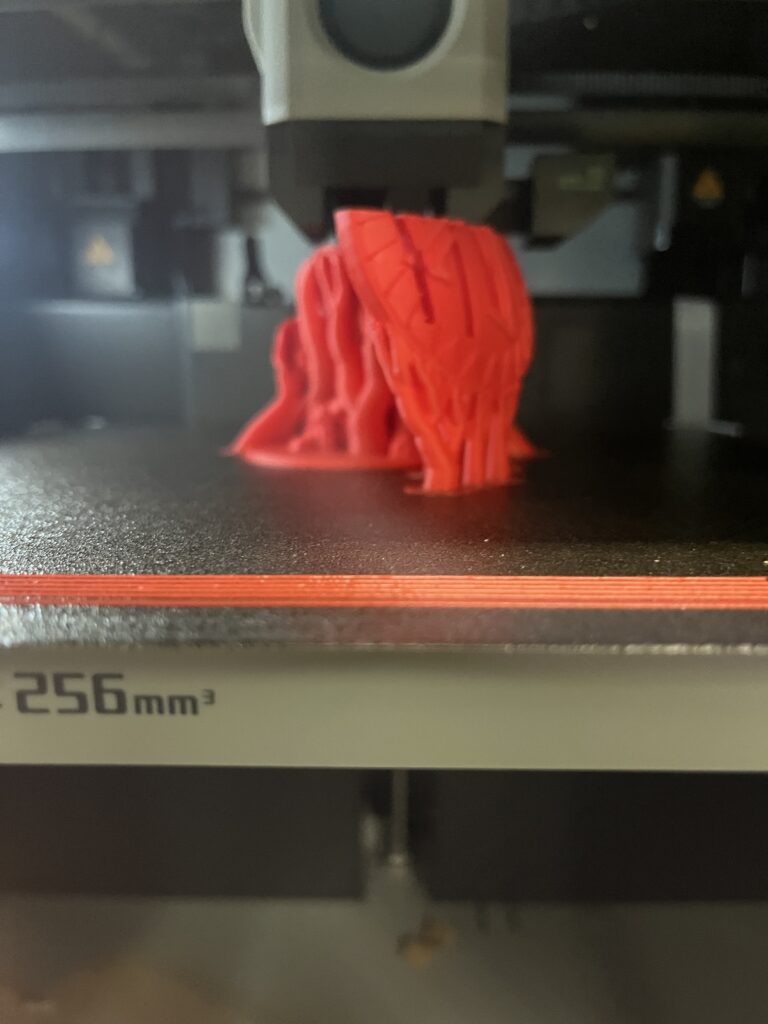
In Ryan’s design lab, he has three new 3D printers and he also had a couple older ones which was put to the side and was not plugged in. The new 3D printers were in use when we went for a visit. Ryan did say that these new machines were faster to make projects and he also said that they were around 40% more accurate.

Train Model:

Some of my classmates created this train model where the car reacts to the colour of the tracks.

Makedo Tools:

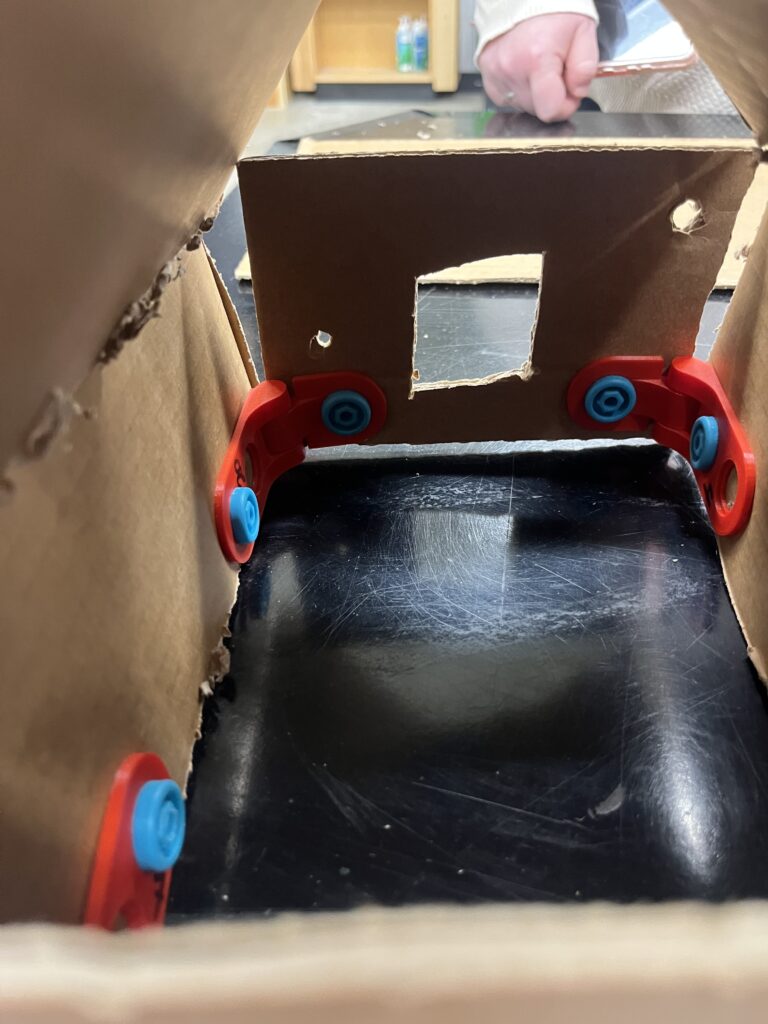
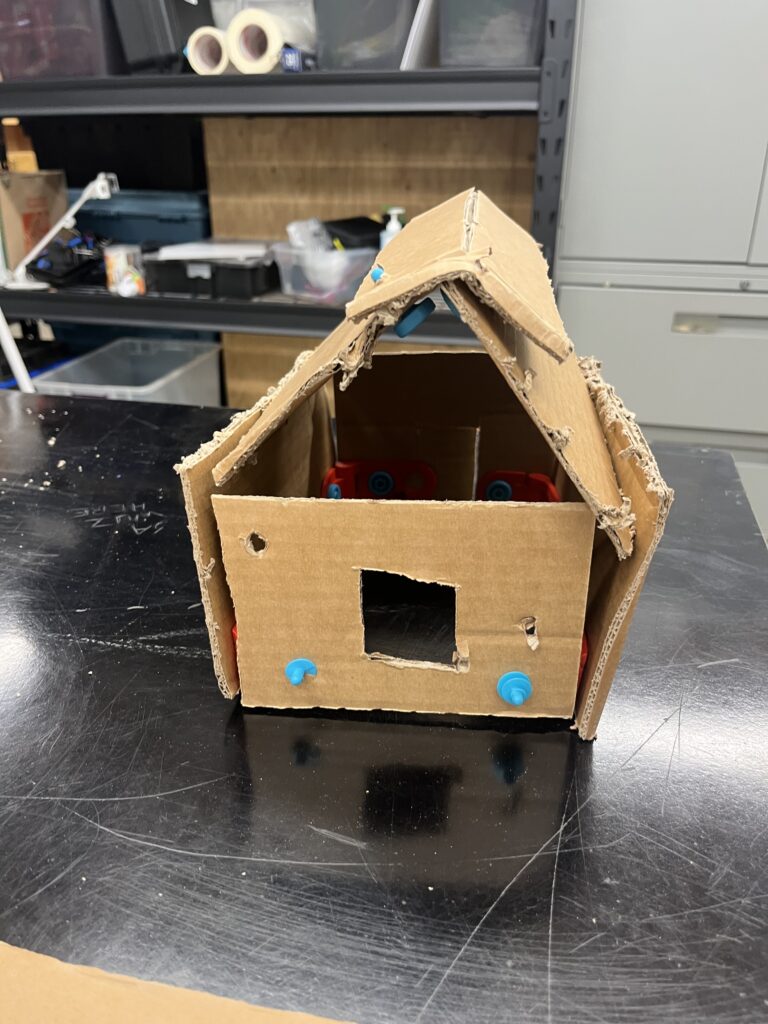
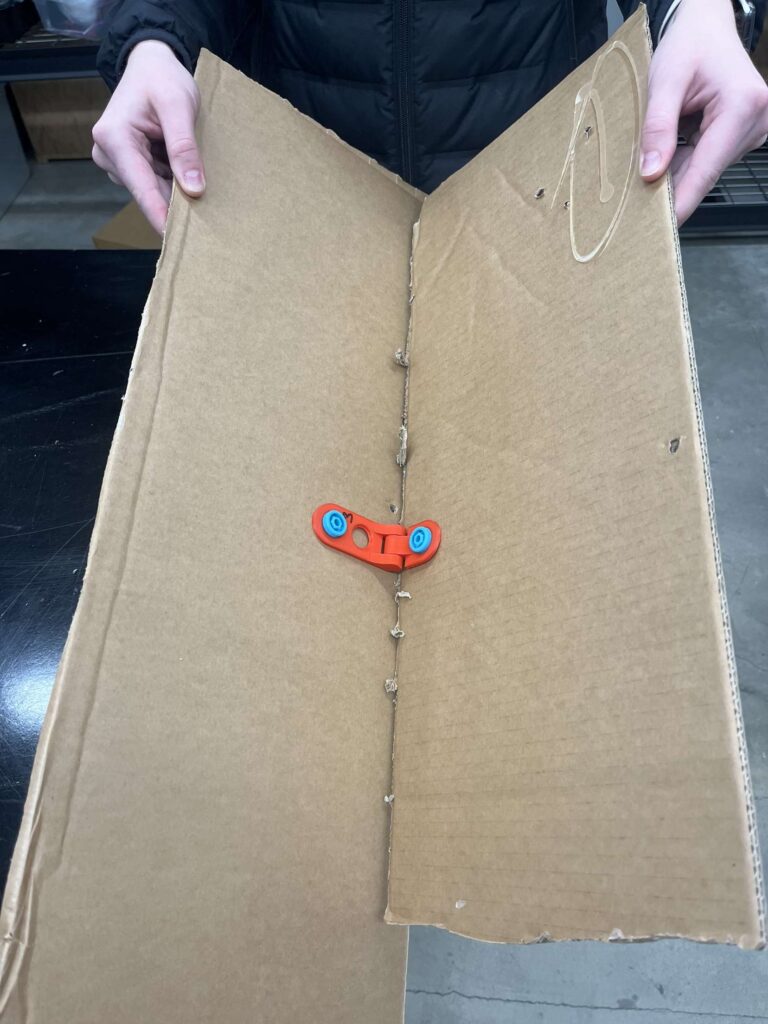
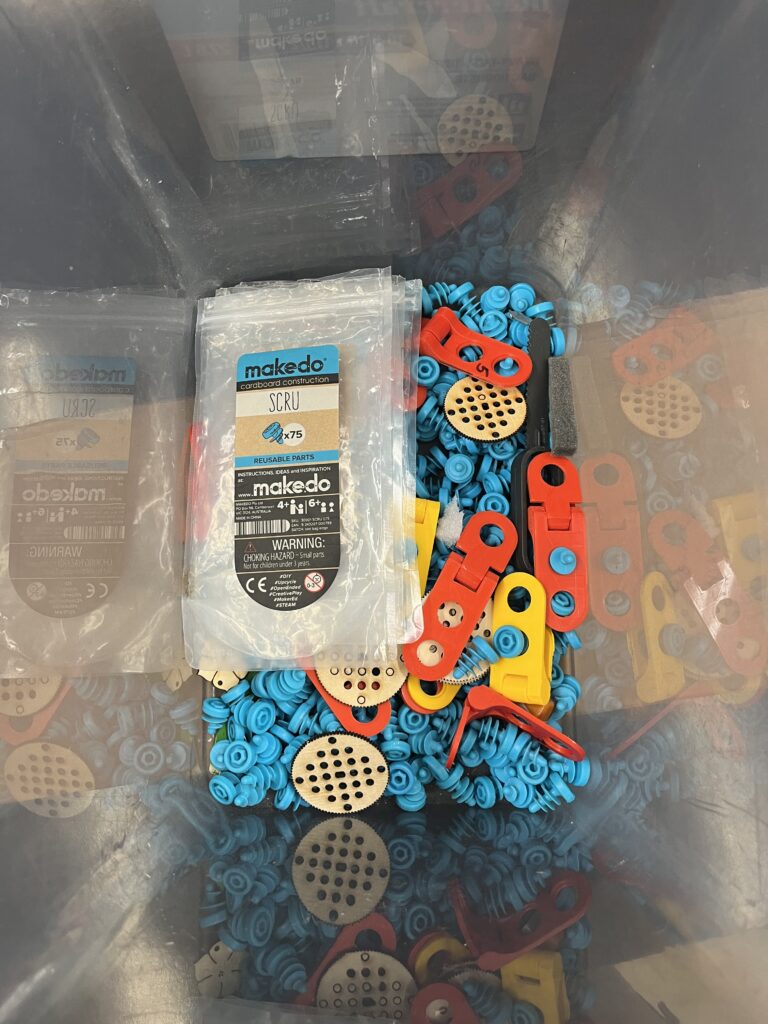
This tool for students was so cool. It definitely elevated construction in an Elementary School setting. The cardboard creations you could make with these tools was endless. These tools included knifes, screws, and brackets. These tools enhances imagination and can bring these 2D creations to life. Additionally, this would be an affordable, long lasting toy for many students to play with in the elementary level. You could also bring this into the middle school or even high school physics class by making the students build the tallest tower with a specific amount of each tool. There is also a tool which helps you take apart the screws.


Scrib3d 3D Pens:

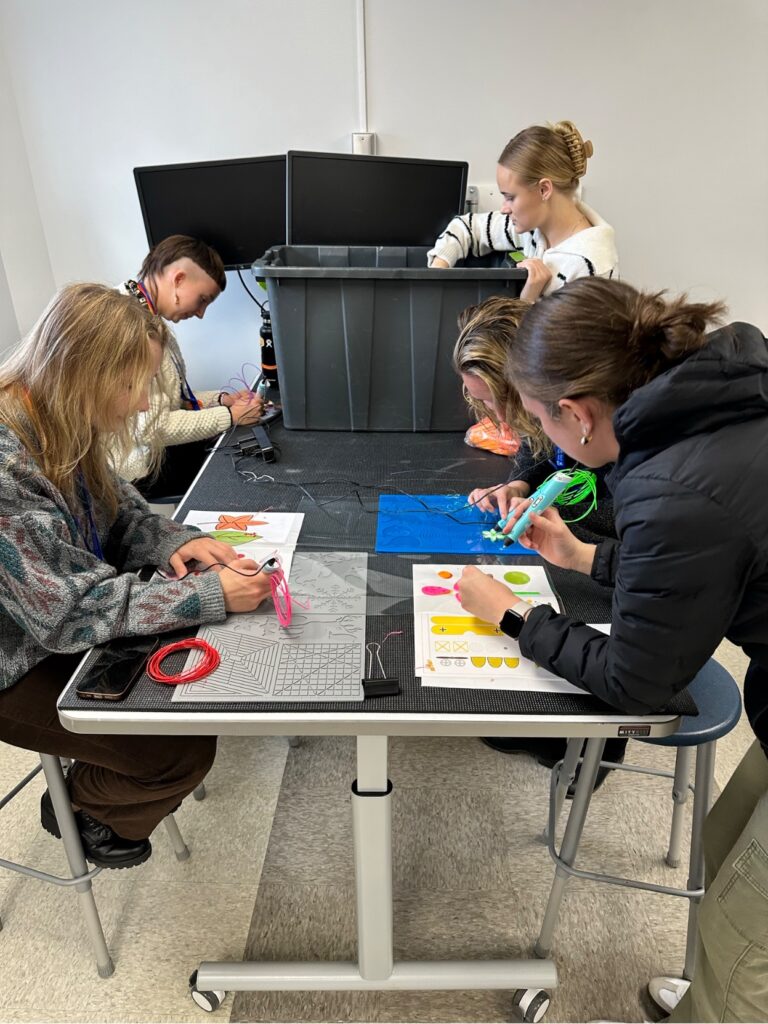
During this class period at the design lab, I spent most of my time playing around with the Scrib3d pens. These were so much fun to use and it was definitely a stress reliever. I would definitely buy these one day for my future classroom. Ryan and I got to discuss the pens together and he was telling me how they are fairly cheap (around $35 CAD each). He also said that he was pretty sure that the plastic that the pens use, its biodegradable. The pens also do not get too hot so it is super usable for students and there’s no safety issue for the students.

VR Headset:

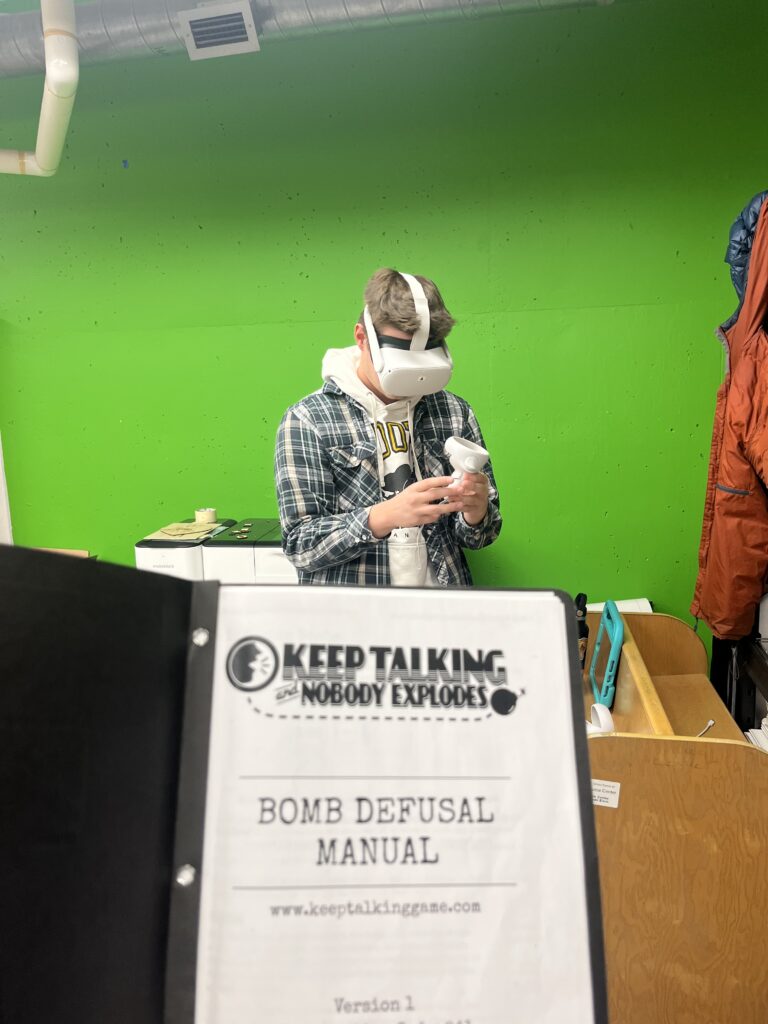
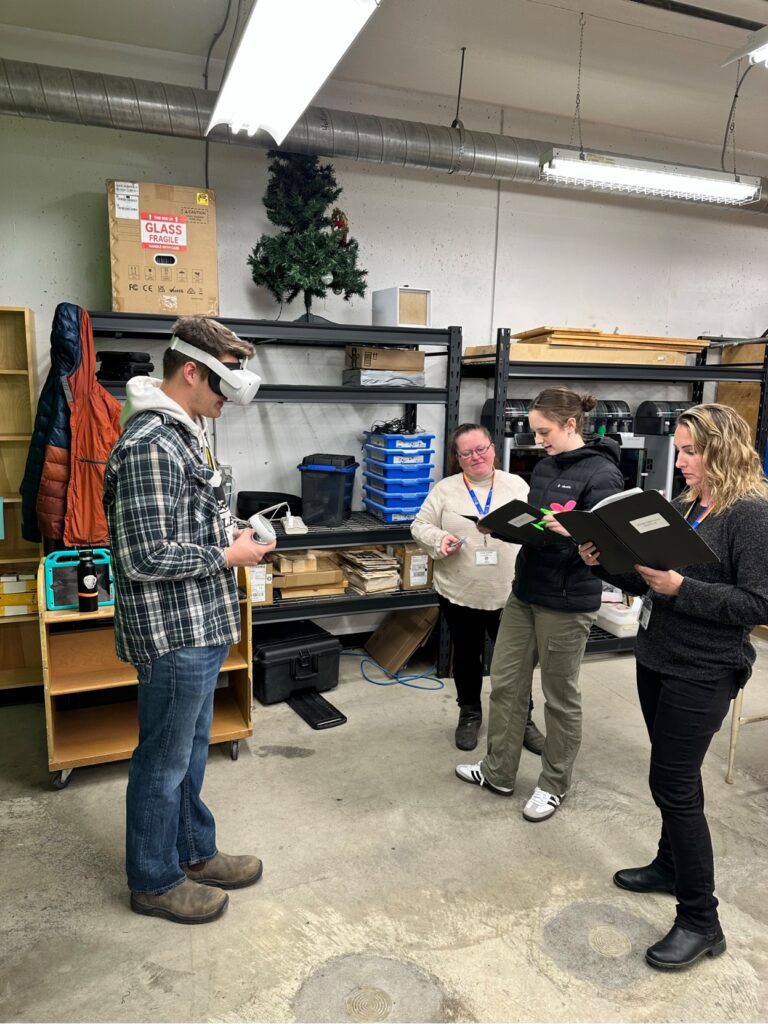
The Vr Headsets were super cool to use. I only had time to do one challenge which was a two person challenge and that was “Keep talking and no one explodes.” This challenge was made for two people, so I did not have a VR headset on, my partner did. I had a booklet will all of the instructions and my partner had to tell me what they saw, then I had to find the page of what they were describing to tell them how to disassemble it. The goal was to disassemble the bomb before the timer ran out and it blew up. We were unsuccessful but we had so much fun trying to complete this activity. While you are trying to complete this activity, it gives you three tries. Additionally, when we were at the design lab at SD#5 this was not the only VR activity you could do, there was other games you could try.

How does it fit in with ‘Innovation in education?

The Kootenay Orchards Design Lab fits perfectly with ‘innovation in education’ by transforming learning through hands-on experiences and creative problem solving. With all of the tools that I have mentioned above and many different tools and activities that I did not list, the lab not only provides advanced technology but also has an engaging environment where students get to develop critical thinking skills without the feeling of doing “schoolwork.” This lab blends technology with playful, student-driven learning and work, sharing the knowledge of different types of technology to the students, and lastly, the confidence and mindset for lifelong learning.

What stood out to me:

Something that stood out to me was how everyone in my class was being so creative and no one’s projects looked the same. This design lab truly opens up a safe space where students or even adults can express how they feel and show their creative side. Additionally, I never knew that you can rent out these activities for your class so that is super neat. I also enjoyed how Ryan said that you can book him and he can either come to your class or your class can go into the design lab and it is a free experience (bus and everything). Having a design lab in our district, allows for teachers to find every students interests and I think that this would be super beneficial for classes to go and see Ryan so he can spark the students creativity.

Which activities did you choose to do?

The activities that I chose to do were the Scrib3d pen and then I did the partner VR. Although, I did not put the VR headset on, I was engaged and using multiple skills and strategies to try and help my partner disassemble to bomb. I spent majority of my lab time playing with the Scrib3d pen and I found it to be so much fun and it was so relaxing.

How do you envision using this space with a class?

Bringing a class up to this space would be a great activity to spark students interests and give them a hands-on experience. I do know for a fact that a lot of students would never have an experience like this before so I think allowing them to play around with different tools and activities could give them a different perspective on what is going on in the technology world and how far things have changed and how things are always improving. Allowing students to have an experience like this might help them find a new interest.

Personally, if I were to use this space with my class, I would just want them to have fun and to enjoy their time. I think in the future if my class has gone to the design lab a couple of times, I could see myself marking them on their critical thinking skills and how creative they were with their projects. Although, each students work (or each groups work) would be very different I think bringing a class here would benefit them in the long run.

I have never really been interested in these kind of activities that I got to play with in the design lab. But after that visit my view on these technologies have changed. I am definitely going to be trying to get some of these tools and activities in my own classroom and I know now that I will be doing my own research on cool activities and different tools that I could implement into my own classroom.

What sort of project would you choose to do?

With a class, I could see myself using the Makedo tools to create a class city. For this project, students would have to work together to create and plan their city layout. I would create groups of two and each group would be allowed to use Makedo tools, as well as markers, paper, pens, scissors and what ever else they would like. This city would be a mini city, and there would be the same maximum area for each group. This project would cover subjects of Math, Art, English and Social Studies. The students would do research throughout this project on what some buildings and towns look like, and how a city can function properly. They would have to plan their building, begin building with the tools, then, once they are finished building and decorating, as a class we would then talk about how a city can function properly and where each city should go on our city layout. Then there would be a writing piece answering questions like “what building do you think were most important? what were some challenges? what would you do differently next time?.”

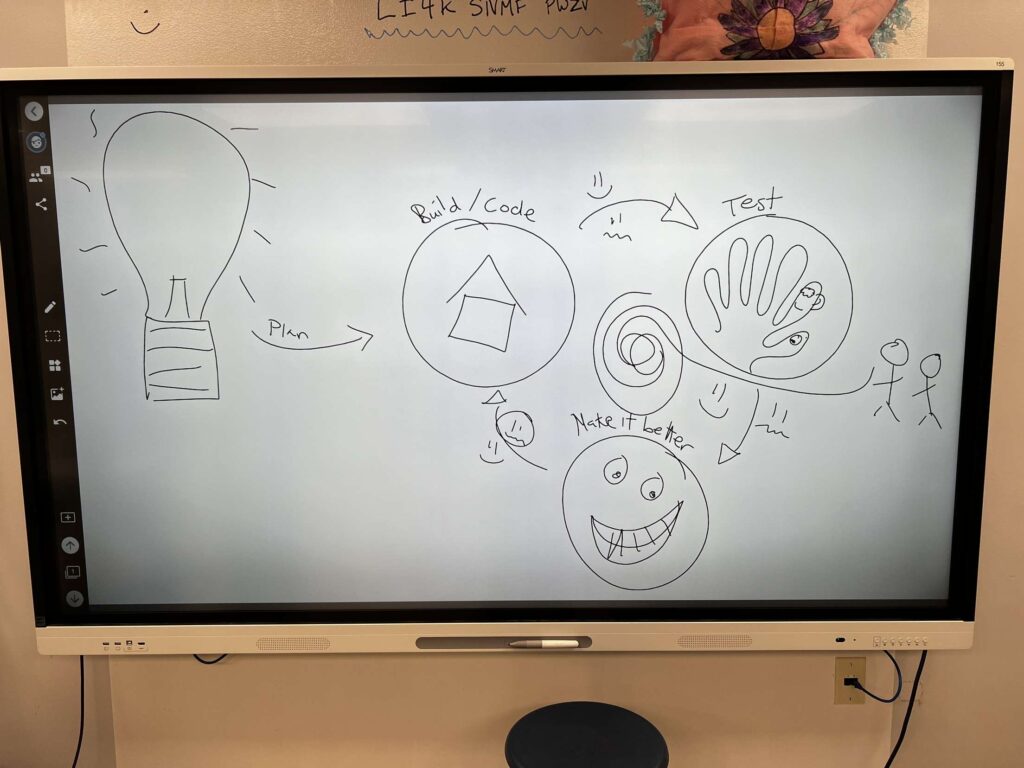
Process of Design:

Ryan Mckenzie explain this process of design to my whole class. First, You have to start out with your plan. Once you have done all of your brainstorming you can then begin to build it or code it depending on what your plan is. If you are done building/coding, you can then go on to test it. If something went wrong or if something did not go the way it was planned while testing, you are going to want to fix it before you test again. Once you are done testing, no matter what there will be ways that you can make your project better, so you will then go and make those changes. This is a continuous cycle. The whole idea of the process of design is that there will be trial and error, which is a huge part in learning. The last part of this process is to share with your peers!

In-situ at GT Elementary School

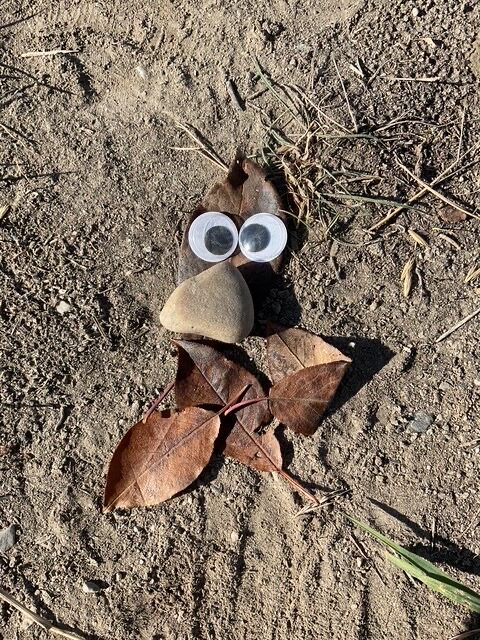
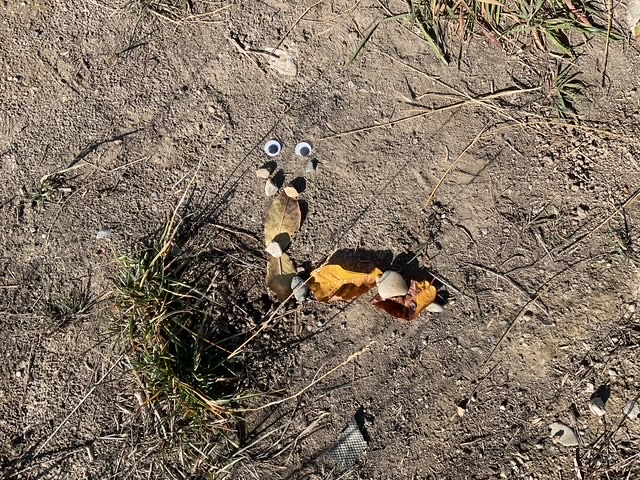
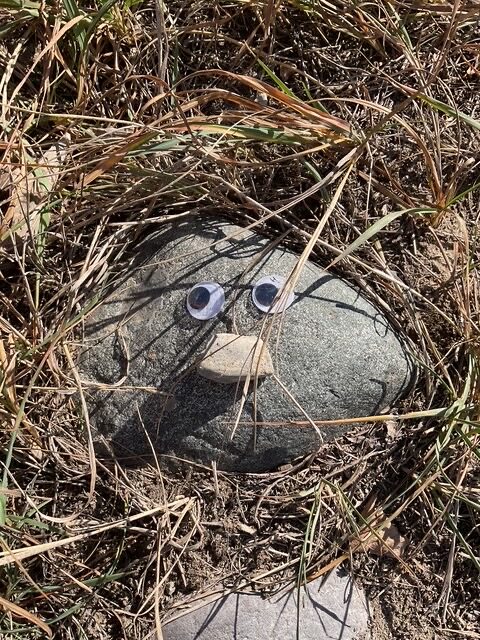
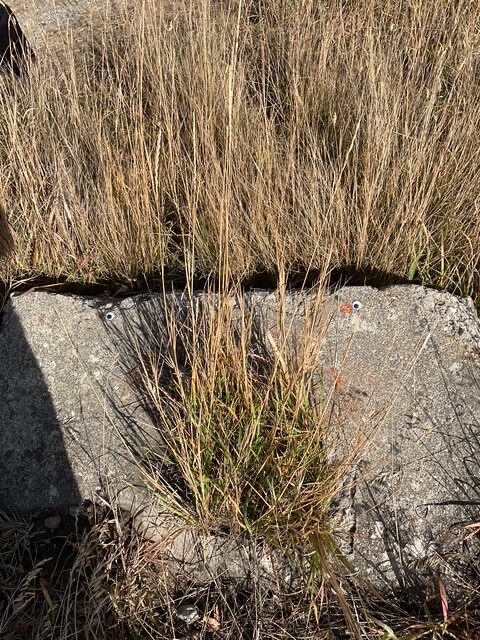
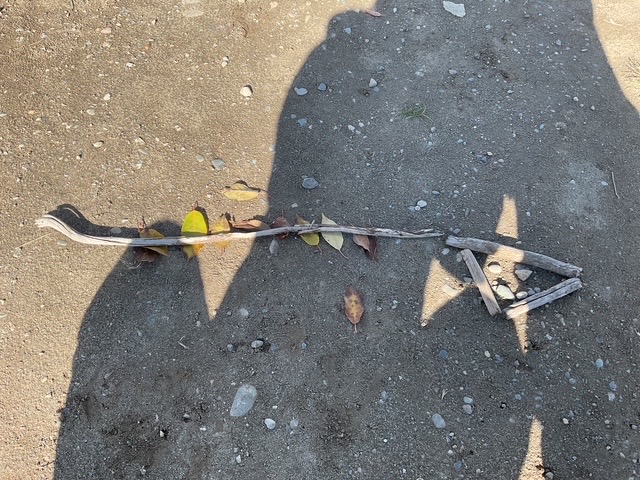
This week, my technology class did an in-situ at Gordon Terrace Elementary School and we celebrated Take Me Outside Day by walking to Elizabeth Lake and back. We were able to join a grade two class and help them create animals at Elizabeth Lake using natural materials like leafs, rocks, and sticks to form these creations. Before we walked to Elizabeth Lake to make the leaf animals, the grade two teacher, read the students the book “Leaf Man” by Lois Ehlert. Additionally, before we left, my cohort and I created a presentation on the different animals that the students could possibly see. We also brought googly eyes for our group of grade twos so that their animal creations could have eyes. Each group of student teacher candidates and students brought one iPad to capture pictures of the students creations. This is what my group ended up making.

This was a bird that one of my students made. They were really proud of their creation!

This was a worm that another student in my group made!

This was a person that a member in my group made.

This was another person that one of the members in my group made. They thought that it was super funny because it looks like this person is throwing up.

Lastly, this is a snake that one of the members created!

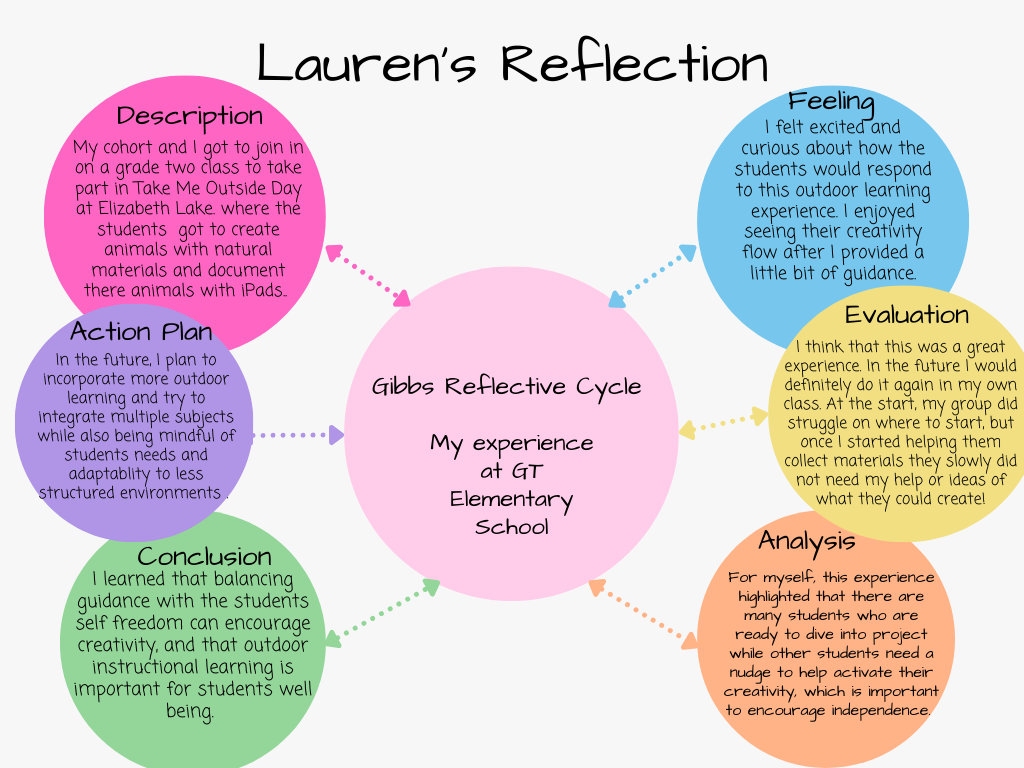
I found that the students really enjoyed themselves when they got to create their animals. I enjoyed watching the students creating their animals and people. I also had fun seeing what the students can do with little materials. When we were just starting at Elizabeth Lake, I could tell that my group was having a hard time focusing and finding materials that they actually wanted to use. Therefore, I stepped in and started helping collect leafs, rocks, and sticks. Once I gave the guidance I could tell that their imagination took off and they really started to enjoy themselves outside. This example of myself having to help my group get started on their project really helped me to understand how some students need that support and how easy it can be to give them. Obviously every student is going to be different but this just made me realize that some students do just need help getting started and then they can take on the project from there. I had no expectations going into Take Me Outside Day. I have never experienced this so I was very excited to see what was going to happen and how the students would like how they spent their afternoon.

Once we were done creating our animals and people, we headed back to Gordon Terrace Elementary School. This is where the students got to look at the pictures we took of their creations and the students showed the student teacher candidates how to use Seesaw. We did not have a lot of time to watch them play on Seesaw but the students did show us how to upload these pictures of their creations on their accounts, and then they showed us how you can draw on Seesaw but we did not have enough time to watch them finish their drawings. Seesaw is a huge benefit for parents, they get to see what their children are doing during school and then they have a photo copy of all assignments that their child has created.

So What?

I think that it is super important that students are able to take on their own projects on their own. Some students, as I learned, are going to need help getting started. I think that a small nudge or a little bit of help for these younger students really encourages them to be independent. I also think that Take Me Outside Day was a good example on how students look forward to days where they are not so structured and how they get creativity freedom away from the classroom. Something that I also saw during my time with my group was that this type of learning with young students encourages engagement and allowed the students to collaborate with each other. This experience links to my personal development by understanding that being patient and being adaptable to students needs builds my emotional intelligence and strengthens my ability to connect with my future students at their level. This experience links to my professional development by allowing me to practice my classroom management in an outdoor setting with smaller groups. This is also developing my language when I am around students and what I can ask them so that they are encouraged to be creative. Additionally, learning Seesaw with the students contributes to my digital literacy. This experience connects to my academic development by gaining insights into differentiated instruction for students.

Now What?

As a teacher candidate, I think that this experience was great for the students and for my cohort and I to see what outdoor learning can look like. Something that I would like to do as a result of my experience would be to integrate this into my future classroom and to bring in other subject outdoors. I think that for Take Me Outside Day it would be super cool to have the class outdoors all day. I know that this would be challenging but I think that there could be some activities that you could do that would cover majority of the school subjects. A draw back to this could be age, and if there are students in the class who don’t do well when their daily routines are switched.

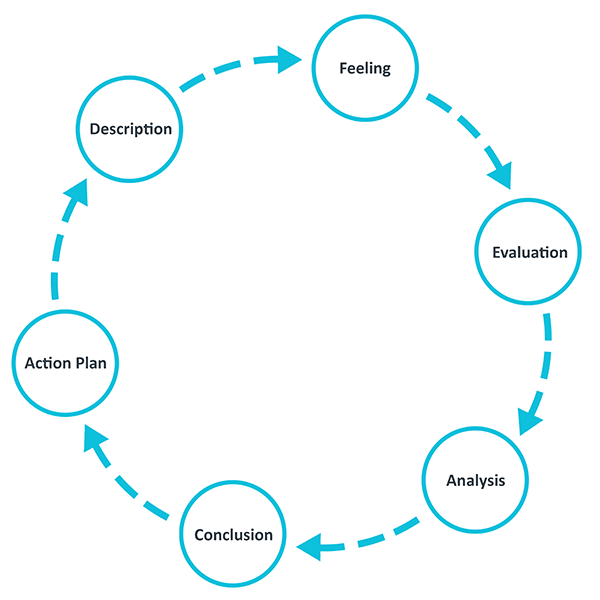
The Gibbs Reflective Cycle is six stages of where you explore an experience. I am going to do the Gibbs Reflective Cycle with this experience using Canva!

Here is a link to School District #5 Outdoor Education/environmental.

My Canva Experience

Stop Motion Video

For my reflection this week I will be talking about stop motion videos. Last week we created a stop motion video with three other people in our cohort. I created it with Carter White, Carolyn Mclean, and Barbra Skawski.

Materials we used:

  • Wooden penguins
  • Lego boat
  • Foam seat
  • A solid wall as our background
  • Phone to take the pictures

Take a look at our video that we created!

This week my class visited an elementary school in the area, where we collaborated with the students to create a stop motion video using the app Zing Studio.  

Material used:

  • Desk pets as the main characters
  • White board for our background
  • School iPads to capture each picture

It was an awesome experience working with the group of students. They were able to teach us both something new about the Zing Studio app which was that you could slow down the video you created if you wanted to make the video longer, which is something that both Carter White and I have not explored on the app yet. Check out the video that Carter White and I created with our group of students!

Throughout these experiences using stop motion videos in a class setting, I learned about the creative potential as well as time management constraints and technology familiarity. Collaborating with students provided me with new insights into how younger students can teach us something new and a lot of the time when it comes to technology, they will most likely know more than me.

Different type of stop motion videos:

  • Claymation
  • Cutout animation
  • Object motion
  • Puppet animation
  • Pixilation
  • Time-lapse

General equipment that you would need:

  • A camera (smartphone or tablet)
  • Tripod
  • Object that you will be moving (puppets, cutouts, wooden objects)
  • In a classroom, I would add random craft supplies so that the students can be creative for props and use their imagination
  • Any stop motion software
    1. Stop Motion Studio
    2. Dragonframe
    3. iStopMotion
    4. Zing Studio (which is what I used for both videos because it was already on the school iPads and it is free)

The timeline of creating a stop motion video can be very dependent on what you are doing for the video and how long you want the video to be. When I created the first video with my peers, we received less than an hour to do it and learn about the app. When we were collaborating with the students, we got an hour and a half to complete a filled out a story board about the events that were going to take place in our stop motion video and to film our stop motion video. That being said, in a classroom, a stop motion video could be planned in multiple days (story board one day, then film another). I would recommend doing it in two parts, story board then filming, or have a bit more time to complete the film because I found that we were rushing towards the end and we did not complete our storyboard.

Stop motion videos can be used many ways for educational purposes. If I were to include stop motion video into my future classroom, I could use it as a tool to engage students while allowing hands on learning and using their own creativity to learn about Science, Math, English, Art, and Social Studies. If I were to use stop motion videos in my own classroom, I would plan the story board for the day before I allow the students to film. I would also incorporate making stop motion videos in my classroom in multiple subjects like my list below!

  1. Science – Stop motion videos can be used to show and visualize scientific processes:
    • Plant growth (students could create a time-lapse animation showing seed germination, root development or leaf formation )
    • Animal evolution (students could use clay or drawings to show this)
  2. Social Studies – Stop motion videos can be used to show historical events or storytelling:
    • Recreating historical events using figurines or cutouts
    • Have an indigenous elder come and tell a story to the students and then they have to recreate it
  3. English – Stop motion videos could be used for storytelling and narrative skills
    • Students are in groups, get them to create a story and then they have to narrate (do a voice over of the video)
  4. Math – Stop motion videos could be used to visualize concepts and problem solving steps
    • Could get students to create a stop motion video to show their problem solving and their steps that they took to get their answer
    • Teachers could also create a stop motion video to demonstrate problem solving steps or videos about shapes

A couple more ideas that I have brainstormed were:

For Earth day, you could get students to create stop motion videos about Reduce, Reuse, Recycle. Or students could do research on how materials get recycled and they would have to show the steps of the recycled items lifecycle.

Lastly, for younger students could make a stop motion video on emotions and social interactions. You could split students up into multiple groups and have a couple groups doing emotions and what they mean, and the other group could create a video on conflict.

Creating stop motion videos with my cohort and with the students was such a great experience. With the students, you could tell that they were engaged and that it didn’t quite feel like school for them. The only thing I would change for stop motion videos in a classroom would be to allow for more time by planning the story board one day and then the next day the students would be able to create their props and film their movie. If I were to do this with a class, I would also bring out a whole bunch of materials that each group could pick from so that students have equal access to the materials (paper, whiteboards, markers, scissors, string, etc). Additionally, when working with the students they were in Grade 3, therefore if you were to do it with a younger group of students, they may need more assistance.

Screencasting and Epic! Books

For this week’s class, we learned how to make a screen cast using the app Screencastify. I have never used anything like Screencastify or Epic! Books, so I did not know what to expect. With the instructions of Allie Kostiuk, I was able to do a recording of the app Epic! Books which I then show you how the app/website works. Epic! Books can be accessed through their app or through their website, and it is a platform that provides teachers/educators and students with access to a variety of eBooks, audiobooks, educational videos, and educational quizzes on the books. For more information, check out my video that I created using Screencastify. After I created the video, I used iMovie on my laptop to edit the video.

Screencastify can be used in the classroom by recording lectures, step-by-step tutorials, and lastly student presentations to present their topic if they are feeling uncomfortable or anxious to present in a class setting. Epic! Books can be used in the classroom by allowing independent reading, reading comprehension practice, and allowing students to have different book variety in the classroom. Additionally, on Epic! Books, educators can view what books students are reading and how long the students have been reading for. Epic! Books is a great resource for reading and literacy.

There are many benefits for both Epic! Books and Screencastify. They both allow teachers to reach out to students who may not be able to attend class or for those students who may want or need to hear the lesson again if they don’t grasp the concept. Which then allows students to access these read alongs or Screencasting‘s of different subjects anytime that they want. There is also some limitations and that would have to do with copyright and student limitations to technology. As a class, we talked about copyright, something you would have to look into is if Epic! Books allows recordings of their books. My experience of gaining knowledge for both Sceencastify and Epic! Books has been very valuable for enhancing my digital teaching toolkit and something that I will definitely be implementing in my future classroom. Epic! Books and Screencastify contribute to my academic, professional and personal development by enhancing my own understanding of educational technology and exploring new teaching methods, keeping students engaged, shows flexibility in lessons, shows my creativeness for editing the Screencastify videos and overall it would improve my communication skills.

Check out my tutorial on Epic! Books.

My Digital Footprint

After watching the TED Talk “Reevaluate, Rethink, Release” by Jesse Miller, I’ve begun to think more critically about my digital footprint. Jesse talked about the importance of reevaluating our digital habits and being mindful of what we share through the technology we use. I’ve always been aware that anything I post or share will leave a digital trace, but this talk made me understand how easy it is to find personal information.

When I searched my name, “Lauren Penney,” I found that many other people with the same name appeared before me, but it didn’t take long to locate myself. The first result I found was from 2022, a post by the Cranbrook Townsman about my signing for the College of the Rockies Women’s Volleyball team. The first two links were from the college website, documenting the two years I played there. The third link was my Hudl account, which features videos of me playing volleyball.

I was curious about how much more I could find, so I decided to search “Lauren Penney Cranbrook BC.” This search revealed even more—everything from my social media accounts to articles about volleyball opportunities I received, including a mention of my club volleyball team back in 2019. Although I still found information about other people named Lauren Penney, most of the pictures and links were about me.

I was surprised by how much information was available about me, and I didn’t expect it to be so easy to access. I thought there might be one or two things, but I found more. While my social media accounts are private, and only my usernames and profile pictures are visible, I wasn’t expecting to find much. Most publicly available links were related to volleyball, which I had expected since I had signed consent forms.

This experience made me realize how much and what we post online shapes how others see us—and that perception can be either positive or negative. Even though we might delete something, it can still exist somewhere online. Searching for my name has shown me how easy it is to find information about people.

As I move forward, especially as I prepare to enter the teaching profession, I’ll be more conscious about my digital footprint and will always ask myself how I want the parents of my future students to view me online.

My Experience with Social Media

For my first reflection, I’ll be discussing my experience with social media. I started using social media when I was in Grade 4, which, looking back, was quite young to be accessing the internet. At that time, I was so excited to have Instagram because everyone my age had it. However, I realize now that I didn’t know the safety precautions that are crucial for protecting personal information online.

I’ve grown up alongside the development of TVs, computers, and smartphones, so I feel very comfortable using social media. For the most part, I use it to stay updated on what my friends and family are up to. The platforms I’ve used for personal purposes include Instagram, Pinterest, Facebook, TikTok, VSCO, and YouTube.

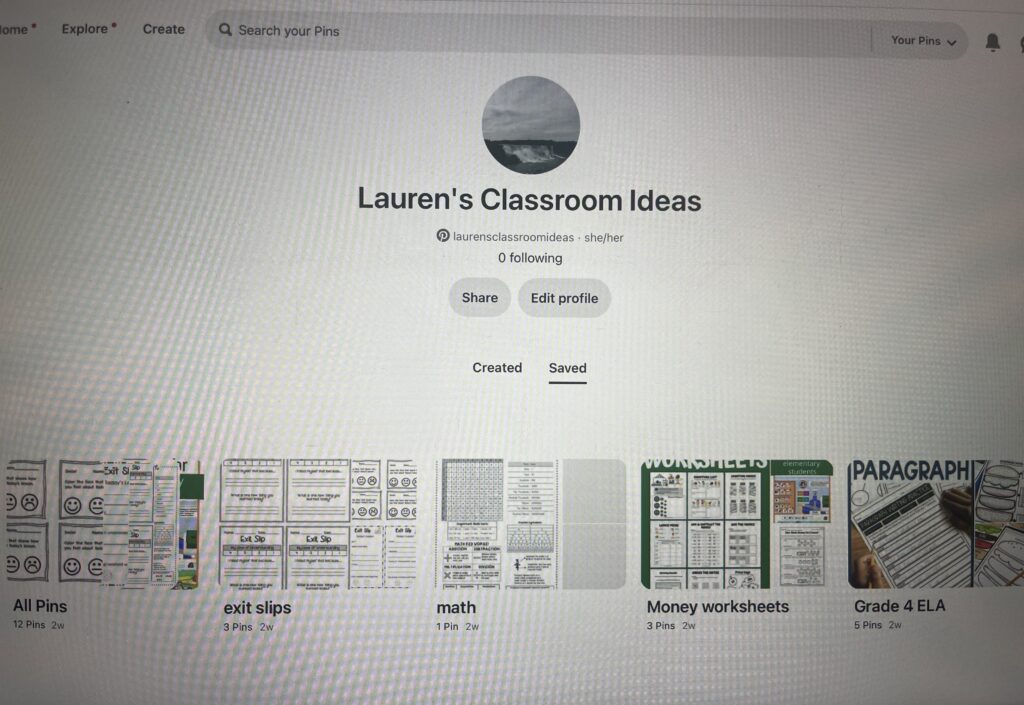
Out of all of them, Pinterest is my favourite because it allows me to organize and create ideas, whether for educational purposes or day-to-day life. In our recent classes, we’ve discussed which platform we would most likely use professionally, and for me, it would definitely be Pinterest. I love how I can take ideas from others, adapt them for my future classroom, and modify them to meet the needs of my students. Throughout my schooling and practicums, I plan to gradually build a Pinterest board filled with ideas for student engagement and educational content.

I’ve had a lot of personal experiences with social media, so I understand why so many people are drawn to it. It connects us with friends and family, provides a form of communication, and can even be used for educational purposes. In my case, social media has also helped me confirm that teaching is the right profession for me, as I’ve gained inspiration from teacher content creators on TikTok and Instagram. That said, I recognize that many people, including creators, often post to show the world how they want to be perceived.

While I’ve had positive experiences with social media, I’ve also faced some challenges, particularly with time management. Social media is so easily accessible that I often find myself procrastinating, spending 20 minutes on my phone when a task might only take five minutes to complete. To address this, I’ve set time limits on each app to help minimize my screen time.