Danika and Sarah think it can be used for students to catch up on work through this website, and to keep parents updated on what is happening through out the class. They included multiple videos and diagrams to help students do the same and understand the same concepts as if they were in the class. They also included what the students need to do and the next assignment is. they also mentioned backwards classrooms and how they would not recommend. But they said that you could use a website for a backwards classroom.
ClassDojo School – Presentation with screen casting
Connor, Eva, and Carter are talking about the view point of parents, teachers, and students.
As teachers: you can communicate with parents and students. you can create groups and as the teacher, you can see what the students are doing. There are a bunch of games on the Dojo island. You can create lesson plans on the fly and the AI will create the lesson plan for you. You can do your attendance, give awards and participation marks. There are a lot of resources for teacher to use. Could send check marks to students. Carter found it hard to navigate. When you want to post something you can make an event happen make the day, time and then post it to the parents to sign up. Parents will then be able to sign up for chaperoning through the app. More of a free time game for students. Teacher can go in and learn with the students. They can set boundaries for the students on the Dojo islands so the students have to play the certain game or interactions with the different subjects.
For parents: it’s fully downloadable, and you can view your Childs collective history at “points” and you can give your child points as well if they have accomplished something at home.
For students: Gamification. interactive way to take part in lessons. Would recommend this for students in elementary school. Customizable characters. digital portfolios that will carry on through your school years (k-12).
Mental Health and Technology- Ryan, Carolyn, Jenna, and Ryley
Apps:
Calm App (mindfulness)
Finch App(virtual pet for personal reflections)
Headspace App (meditation, teachers can access this app for free)
GoNoodle App/website (brain breaks)
LGBTQIA+ are four times likely to struggle with mental health
Meditation, yoga, movement breaks, practice gratitude, and journaling in the classroom.
Moxie (social robot that uses AI) – social, emotional, cognitive skills for kids. Moxie allows for play based learning and mindful breaks. Use Moxie for one on one settings and support students who struggle with socialization.
Inclusive Technology in the Classroom – Barb, Savanna, Graham, Maya
Assistive technology- arrange of tools/devise that helps students complete a task that they wouldn’t be able to do without the assistance.
Screen Reader- Text from computer screen and translates it auditorily.
Braille Devices – help with reading or taking notes, or there are pins that pop up for people to read.
AAC Devices/Apps – Augmentative and Alternate Communication
Single meaning pictures
Alphabet- based systems
Semantic compaction
Apps- LetMe Talk App, AVAz App
Technology for d/Deaf Students
d/Deaf students often attend schools were the majority of people are hearing, and the communication differences can make it hard to learn.
Hearing Loop system – sound sources (microphone that teacher speaking into), the current goes through the floor then goes into the magnetic field which turns vibrations into sound.
FM System (microphone and transmitter system)
Technologies for bilingual students
Common sense education (website)
Basic translators (google translate, ivoice)- translate text, photos, and documents.
Duolingo App
Babbel App – Tool to pair with in-person language lessons
Gamification – Minecraft adventures in English by Cambridge
For this weeks’ reflection, I decided to do mine on the game Prodigy. Prodigy is an educational game where students are wizards and they are engaged in either Math or English Battles. These math questions that are asked on Prodigy adapt to where your student needs more practice. These Math questions can start from a grade 1 level and they can go all the way up to grade 8. The English questions start at a grade 1 level and they go up to a grade 5 level. Teachers are able to track their students progress and receive weekly learning reports to help the teacher identify areas of struggle for the whole class or specific students.
I decided to start playing this game, and I found it to be very fun and I could see why students would like this game and want to play it all the time. I chose to only play the Math battles and not the English battles so my perspective is only going to be focusing on the math portion of this game. Throughout the class, I kept playing Prodigy and I learned how easy it could be and how motivating it could be for students to learn or even review Math. As I said before, in Prodigy you are a wizard, which you get to customize, and you get to walk around an island while you battle other characters. Once you have completed the island that you are on, you get to move to a different island. Throughout your time battling, your characters will be able to get pets and they will be able to level up so that they are more powerful in their battles. At the beginning of this game, I thought that I was not going to enjoy this game and I thought that I wouldn’t be learning anything. But, while I was playing, I started to like the game more and more. Additionally, I could see how this would be super beneficial for students to review topics. Overall, I enjoyed my experience playing this game!
By playing Prodigy myself, this allows me to understand what students experience. This will help me in my future career by understanding games that students would enjoy that are both motivating and engaging. Additionally, allowing myself to explore of Prodigy has helped me be more informed and to create decisions on when I think it is appropriate to use gamification in my future classroom. This experience also shows me the effectiveness of gamification in a classroom and by getting rewards and levelling up throughout the game makes it feel more like play and less like work. My experience with Prodigy helps me analyze from a teachers perspective. Something that I have considered when playing this game, is why certain methods work better for some students than others. When I was playing Prodigy, this shows my interest to find ways to engage my future students and I realized throughout this process that not every student will be engaged in the same way other students will be. I figured this out through my cohort, some of us really liked playing Prodigy while others did not enjoy it at all.
In the future, I would allow my future students to use Prodigy, but only when we would have free time on the computer. I do not think Prodigy asks enough questions for it to be a lesson for Math class. I could also see myself using Prodigy in my future class if there was ever a substitute teacher. I would leave Prodigy as an option if the substitute teacher was not comfortable with teaching what I had planned for the students math lesson. Something that I would also do to decide whether or not I would want to incorporate Prodigy into my class would be to get the students opinions and feedback on the game. Click the image to get a link to my Screencastify video!
I did a little Screencastify video on Prodigy where I take you through what the math section looks like. I also did one battle so you can see roughly how many math questions you get asked and what it is like when you get a question wrong. I did all of my editing for this video on iMovie on my laptop. As you can see from when I was playing, when you mess up on a question, it does not explain to you the steps you should take to fully answer the question and it also does not give you a second chance at answering the question.
Differentiated learning: Prodigy automatically adapts questions to the students performance on the questions. This allows teachers to provide different instruction without creating separate lessons for those students who are either behind or the students who are advanced.
Student engagement through gamification: This gamified experience makes learning feel like play which can improve engagement and students results.
Progress tracking: Prodigy provides teachers with each students progress. Teachers can receive weekly reports that focuses on individual student progress or the whole class progress. This allows teachers to see areas where students might be struggling or excelling.
Goal Setting: On Prodigy, teachers can set specific goals and focus on certain Math skills and concepts.
Rewarding system: The game has a rewarding system which includes levelling up and collecting items in the game like pets. These rewarding systems can help teachers by increasing students engagement and motivation.
What are some of the benefits to gamifying a subject like math?
The position that students may feel towards the subject math might make them feel less anxious or redundant. This games transforms the material into something more approachable. This also allows personalized learning paths which will eventually over time build students confidence.
Increased Engagement and Motivation: Lots of students these day like to be on screens and playing games. Therefore, allowing students to use Prodigy, will make them feel like they are playing a game and not doing school work.
Prodigy gives immediate feedback which allows students to see where they went wrong and to adjust their thinking. If the student has no idea where they went wrong, the teacher is there to help them critically think on where they felt they went wrong.
What are some of the negatives or pitfalls to be aware of?
I think a negative about Prodigy is that there aren’t many math questions that you get asked. So personally, I would not have this in my future classroom unless it was going to be used for a review at the beginning, middle or end of the year, and I think the only time I would use it would be if I was giving my class free time on the computers.
Students might rush through the questions rather than taking the time to fully understand Mathematical concepts.
There might be frustration when the students who find math challenging play because they will not level up or earn rewards as fast as other students who succeed.
Increase of screen time which can affect focus and other health problems. Being on technology devices may also cause a distraction in learning.
There are definitely more positives and negatives on Prodigy or even gamification itself so that is something to be aware of. Gamification is going to be getting more popular in the future so I think this was super beneficial to get to play a couple educational based games.
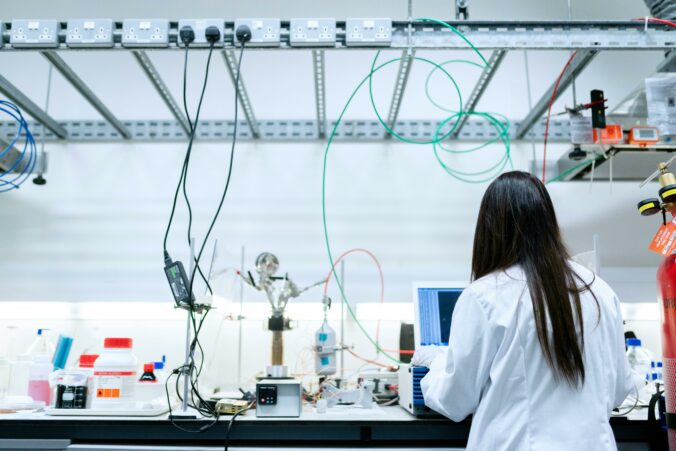
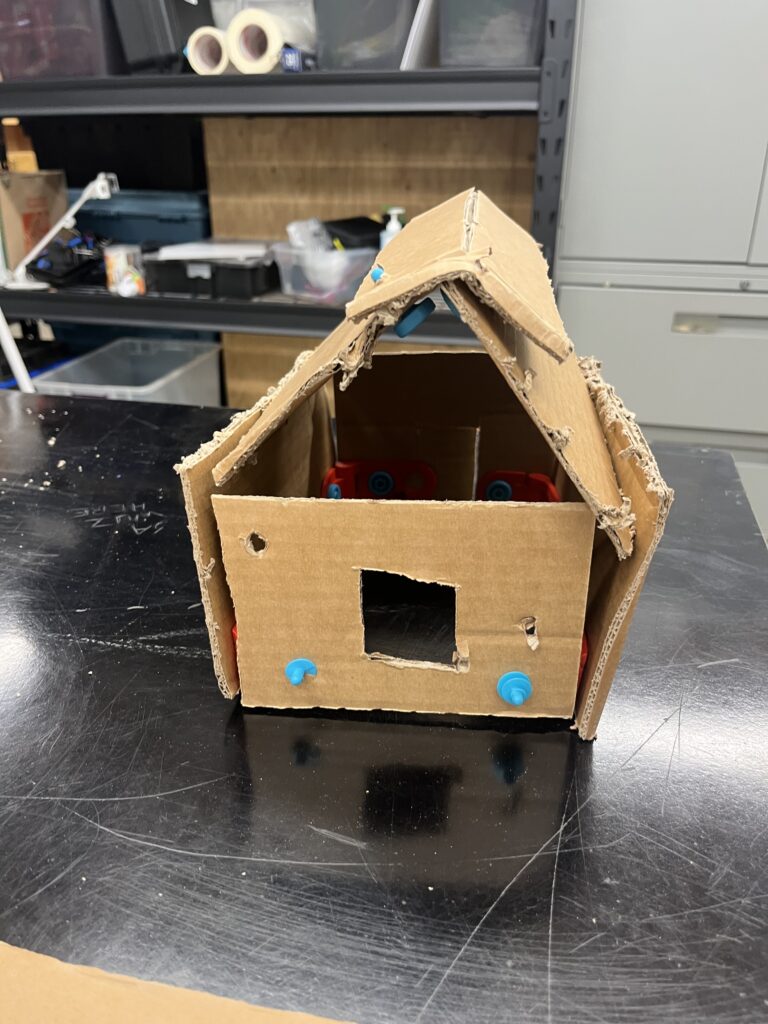
This week for our Technology class(EDCI 366), we went to the School District #5 Design lab which is at Kootenay Orchards Elementary School and it’s ran by Ryan Mckenzie. Ryan not only showed us around in his space, but he also brought out a whole bunch of his resources and let us play around with them. Before we got to play with his resources, Ryan showed us some videos from classes that he has worked with. What I saw in these videos was when allowing students to have these technology resources, they only think that they are playing around but there are many other factors that play a role while you play with these resources. Some of these factors are critical thinking, collaboration, increase confidence with hands on learning, digital literacy, communication (explaining their ideas, explain their process), problem solving, and creativity. Ryan also showed us the SD#5 website and how the design lab has its own section! This link would be super beneficial to use if your own child is in SD#5 or if you are going to be teaching in SD#5. I honestly did not have any expectations going into the design lab and holy was I ever blown away on how many cool activities Ryan had in his lab.
Design Lab Features:
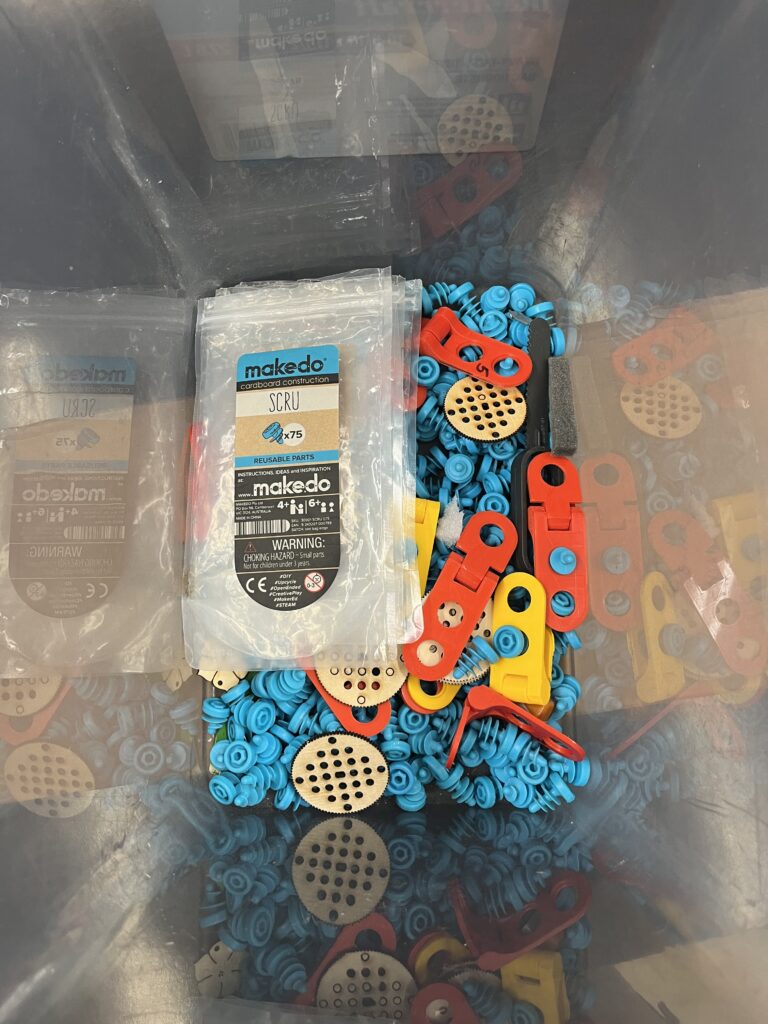
This design lab had so many cool and amazing features that students get to work with. There was everything from a laser cutter, a 3D printer, a green screen wall (I did not capture of picture of this), to train models you could build, to Makedo tools, to Scrib3d 3D pens, VR headsets, and lastly, there was many different robots you could have played with (I also did not get a picture of these). I took a couple pictures, so you can view them down below!
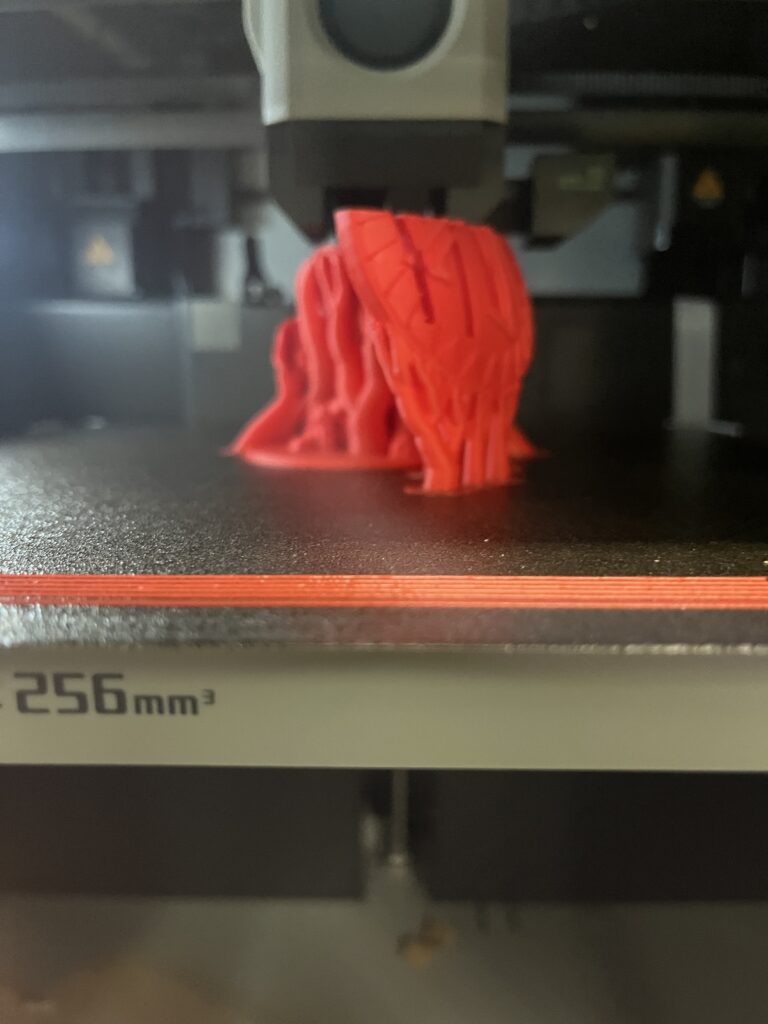
3D printer:
In Ryan’s design lab, he has three new 3D printers and he also had a couple older ones which was put to the side and was not plugged in. The new 3D printers were in use when we went for a visit. Ryan did say that these new machines were faster to make projects and he also said that they were around 40% more accurate.
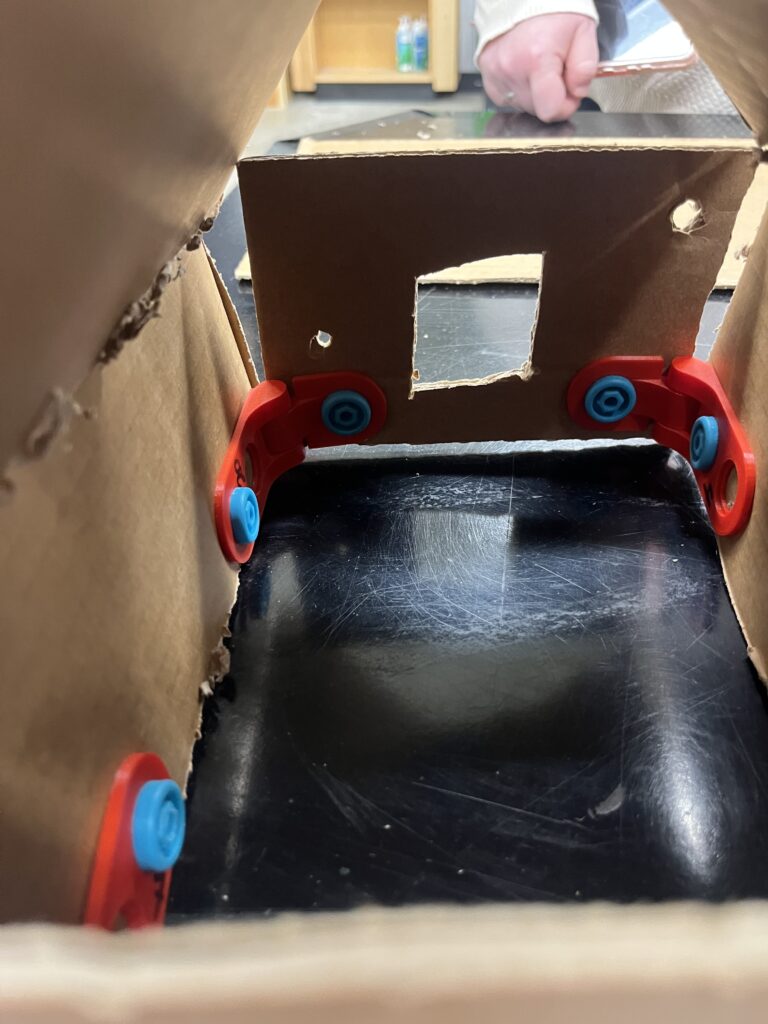
Train Model:
Some of my classmates created this train model where the car reacts to the colour of the tracks.
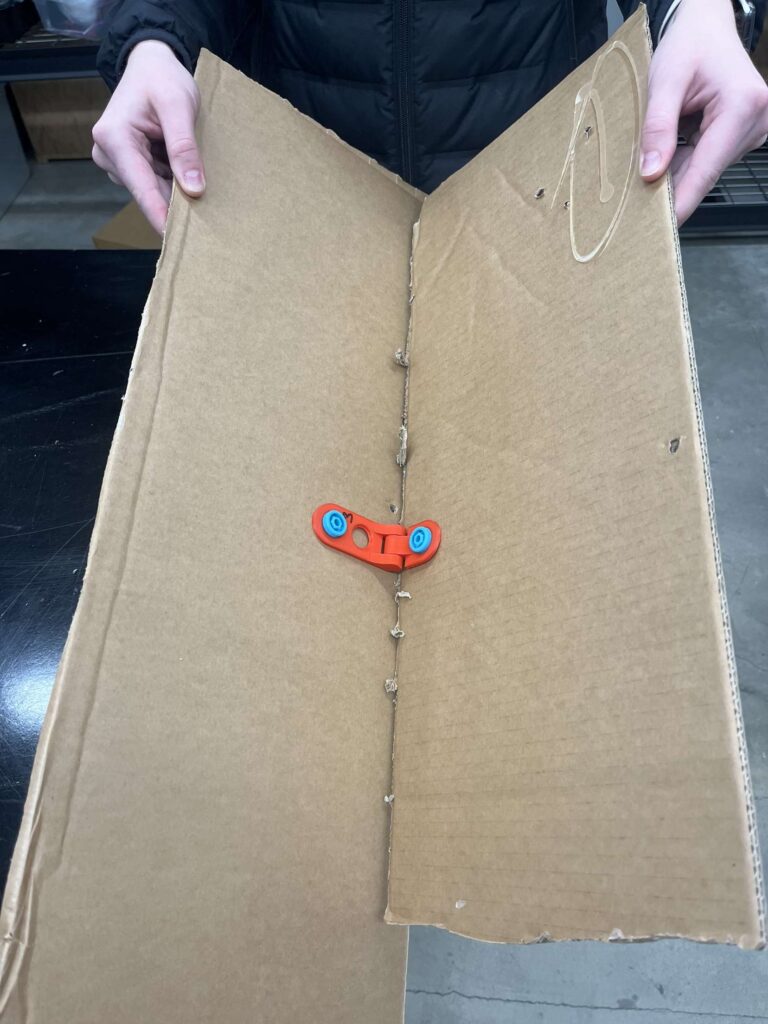
This tool for students was so cool. It definitely elevated construction in an Elementary School setting. The cardboard creations you could make with these tools was endless. These tools included knifes, screws, and brackets. These tools enhances imagination and can bring these 2D creations to life. Additionally, this would be an affordable, long lasting toy for many students to play with in the elementary level. You could also bring this into the middle school or even high school physics class by making the students build the tallest tower with a specific amount of each tool. There is also a tool which helps you take apart the screws.
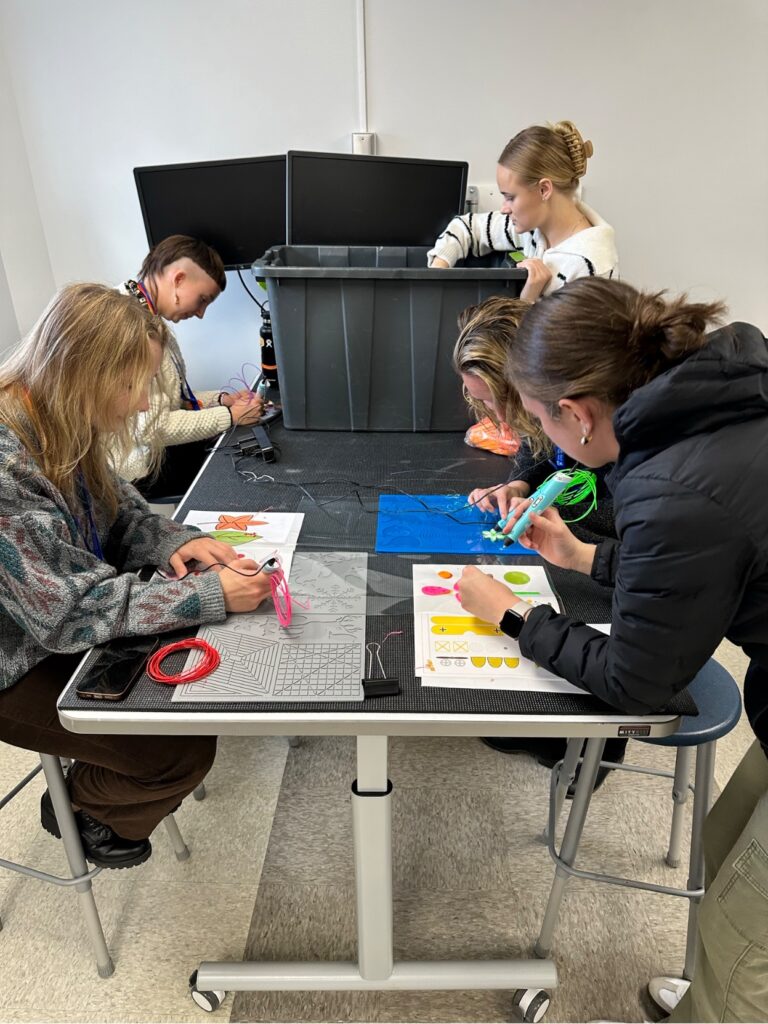
During this class period at the design lab, I spent most of my time playing around with the Scrib3d pens. These were so much fun to use and it was definitely a stress reliever. I would definitely buy these one day for my future classroom. Ryan and I got to discuss the pens together and he was telling me how they are fairly cheap (around $35 CAD each). He also said that he was pretty sure that the plastic that the pens use, its biodegradable. The pens also do not get too hot so it is super usable for students and there’s no safety issue for the students.
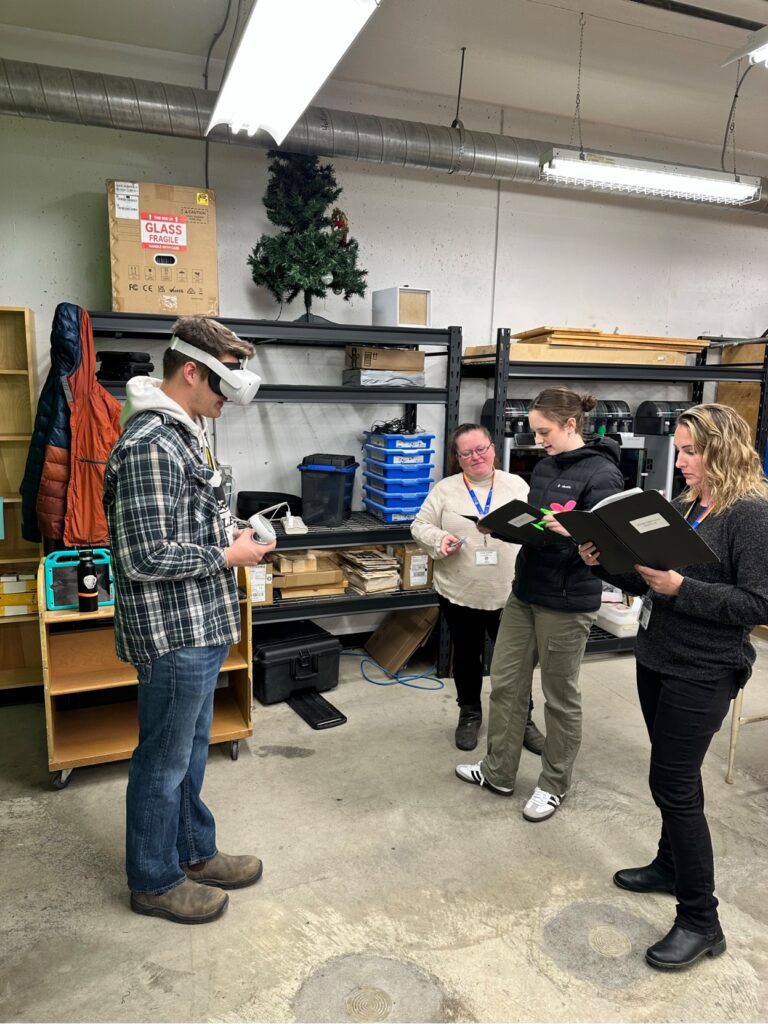
VR Headset:
The Vr Headsets were super cool to use. I only had time to do one challenge which was a two person challenge and that was “Keep talking and no one explodes.” This challenge was made for two people, so I did not have a VR headset on, my partner did. I had a booklet will all of the instructions and my partner had to tell me what they saw, then I had to find the page of what they were describing to tell them how to disassemble it. The goal was to disassemble the bomb before the timer ran out and it blew up. We were unsuccessful but we had so much fun trying to complete this activity. While you are trying to complete this activity, it gives you three tries. Additionally, when we were at the design lab at SD#5 this was not the only VR activity you could do, there was other games you could try.
How does it fit in with ‘Innovation in education?
The Kootenay Orchards Design Lab fits perfectly with ‘innovation in education’ by transforming learning through hands-on experiences and creative problem solving. With all of the tools that I have mentioned above and many different tools and activities that I did not list, the lab not only provides advanced technology but also has an engaging environment where students get to develop critical thinking skills without the feeling of doing “schoolwork.” This lab blends technology with playful, student-driven learning and work, sharing the knowledge of different types of technology to the students, and lastly, the confidence and mindset for lifelong learning.
What stood out to me:
Something that stood out to me was how everyone in my class was being so creative and no one’s projects looked the same. This design lab truly opens up a safe space where students or even adults can express how they feel and show their creative side. Additionally, I never knew that you can rent out these activities for your class so that is super neat. I also enjoyed how Ryan said that you can book him and he can either come to your class or your class can go into the design lab and it is a free experience (bus and everything). Having a design lab in our district, allows for teachers to find every students interests and I think that this would be super beneficial for classes to go and see Ryan so he can spark the students creativity.
Which activities did you choose to do?
The activities that I chose to do were the Scrib3d pen and then I did the partner VR. Although, I did not put the VR headset on, I was engaged and using multiple skills and strategies to try and help my partner disassemble to bomb. I spent majority of my lab time playing with the Scrib3d pen and I found it to be so much fun and it was so relaxing.
How do you envision using this space with a class?
Bringing a class up to this space would be a great activity to spark students interests and give them a hands-on experience. I do know for a fact that a lot of students would never have an experience like this before so I think allowing them to play around with different tools and activities could give them a different perspective on what is going on in the technology world and how far things have changed and how things are always improving. Allowing students to have an experience like this might help them find a new interest.
Personally, if I were to use this space with my class, I would just want them to have fun and to enjoy their time. I think in the future if my class has gone to the design lab a couple of times, I could see myself marking them on their critical thinking skills and how creative they were with their projects. Although, each students work (or each groups work) would be very different I think bringing a class here would benefit them in the long run.
I have never really been interested in these kind of activities that I got to play with in the design lab. But after that visit my view on these technologies have changed. I am definitely going to be trying to get some of these tools and activities in my own classroom and I know now that I will be doing my own research on cool activities and different tools that I could implement into my own classroom.
What sort of project would you choose to do?
With a class, I could see myself using the Makedo tools to create a class city. For this project, students would have to work together to create and plan their city layout. I would create groups of two and each group would be allowed to use Makedo tools, as well as markers, paper, pens, scissors and what ever else they would like. This city would be a mini city, and there would be the same maximum area for each group. This project would cover subjects of Math, Art, English and Social Studies. The students would do research throughout this project on what some buildings and towns look like, and how a city can function properly. They would have to plan their building, begin building with the tools, then, once they are finished building and decorating, as a class we would then talk about how a city can function properly and where each city should go on our city layout. Then there would be a writing piece answering questions like “what building do you think were most important? what were some challenges? what would you do differently next time?.”
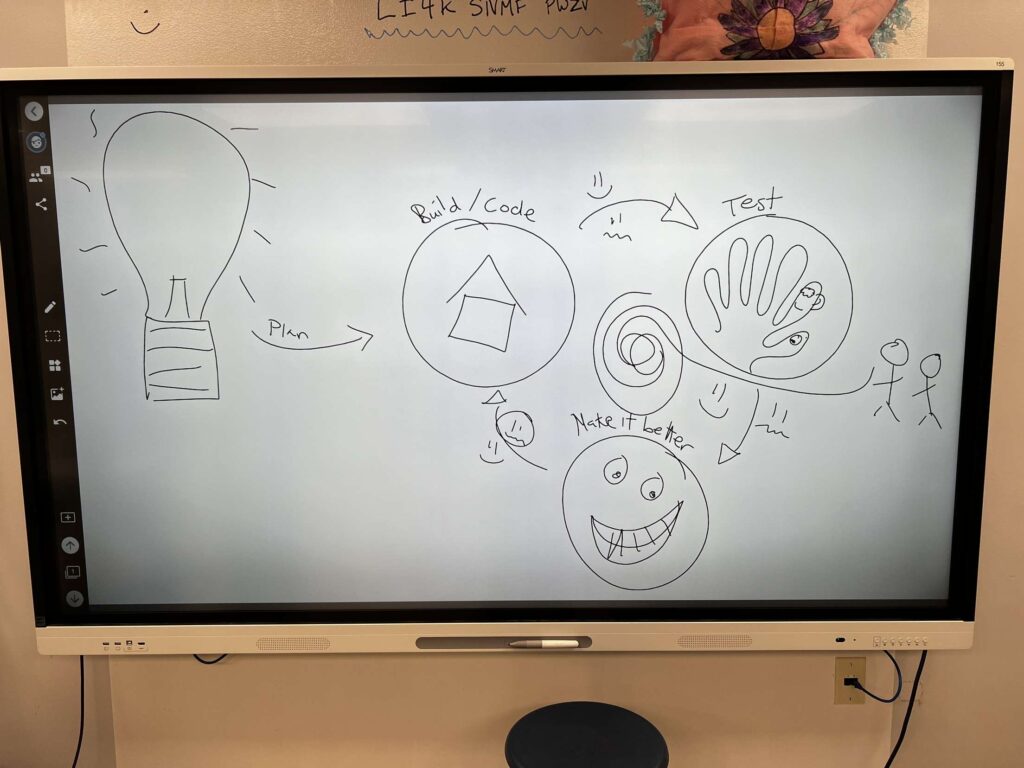
Process of Design:
Ryan Mckenzie explain this process of design to my whole class. First, You have to start out with your plan. Once you have done all of your brainstorming you can then begin to build it or code it depending on what your plan is. If you are done building/coding, you can then go on to test it. If something went wrong or if something did not go the way it was planned while testing, you are going to want to fix it before you test again. Once you are done testing, no matter what there will be ways that you can make your project better, so you will then go and make those changes. This is a continuous cycle. The whole idea of the process of design is that there will be trial and error, which is a huge part in learning. The last part of this process is to share with your peers!
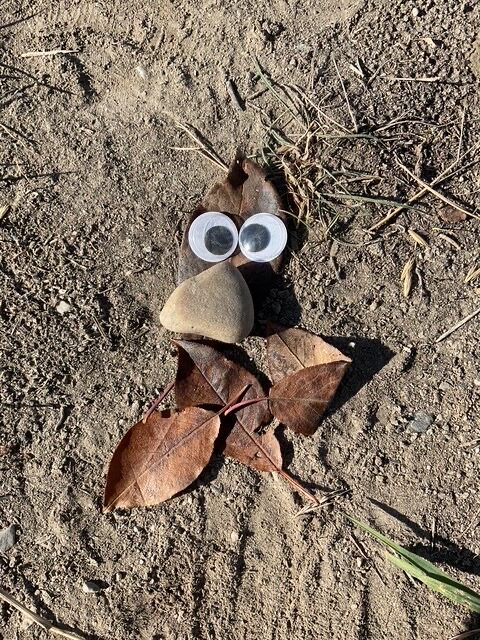
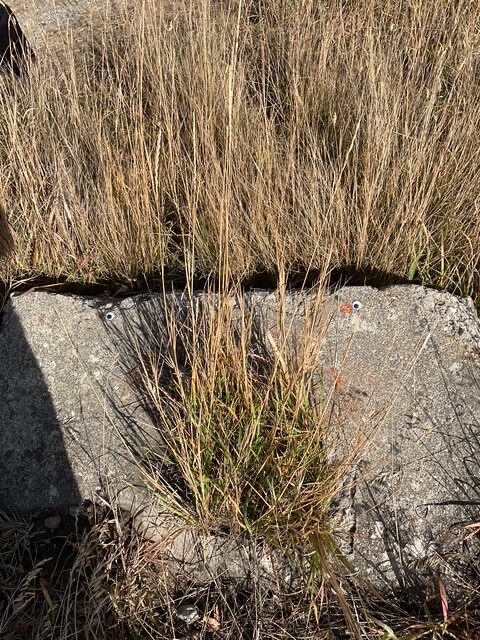
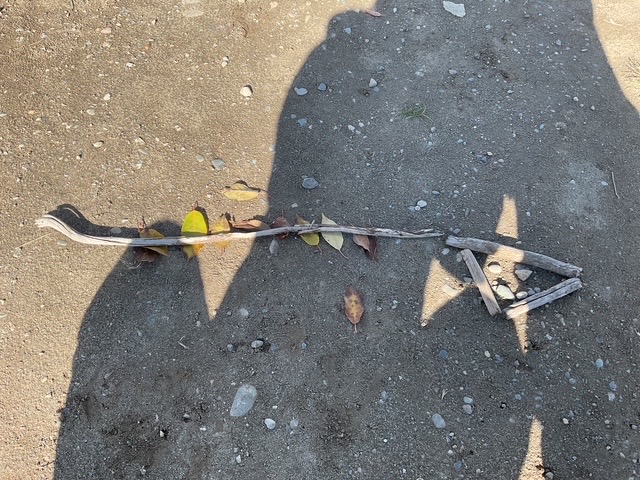
This week, my technology class did an in-situ at Gordon Terrace Elementary School and we celebrated Take Me Outside Day by walking to Elizabeth Lake and back. We were able to join a grade two class and help them create animals at Elizabeth Lake using natural materials like leafs, rocks, and sticks to form these creations. Before we walked to Elizabeth Lake to make the leaf animals, the grade two teacher, read the students the book “Leaf Man” by Lois Ehlert. Additionally, before we left, my cohort and I created a presentation on the different animals that the students could possibly see. We also brought googly eyes for our group of grade twos so that their animal creations could have eyes. Each group of student teacher candidates and students brought one iPad to capture pictures of the students creations. This is what my group ended up making.
This was a bird that one of my students made. They were really proud of their creation!
This was a worm that another student in my group made!
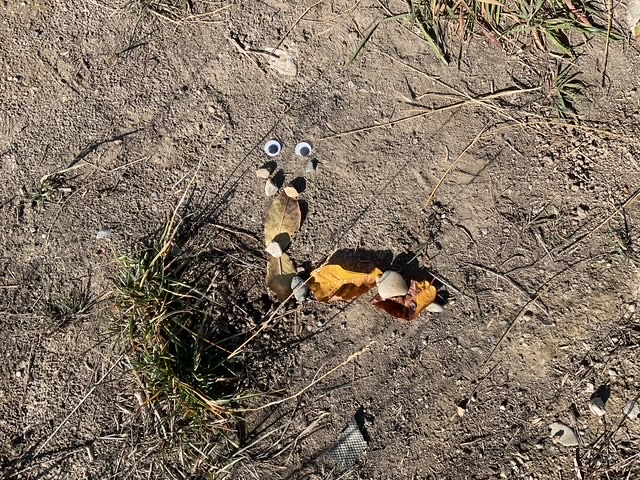
This was a person that a member in my group made.
This was another person that one of the members in my group made. They thought that it was super funny because it looks like this person is throwing up.
Lastly, this is a snake that one of the members created!
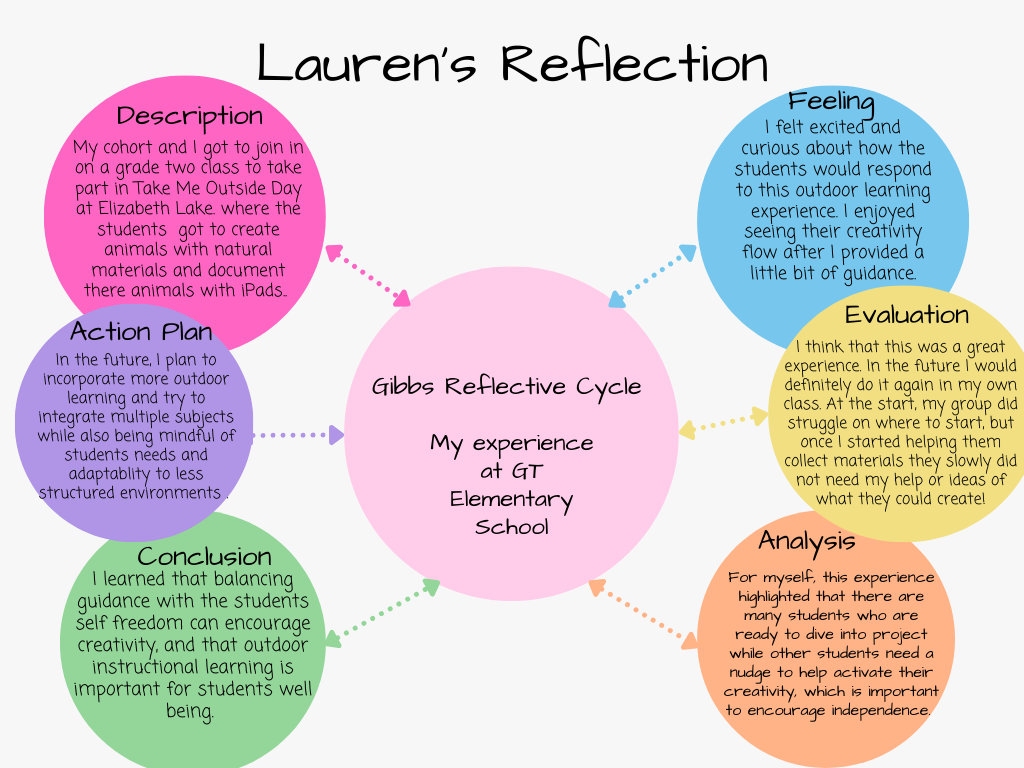
I found that the students really enjoyed themselves when they got to create their animals. I enjoyed watching the students creating their animals and people. I also had fun seeing what the students can do with little materials. When we were just starting at Elizabeth Lake, I could tell that my group was having a hard time focusing and finding materials that they actually wanted to use. Therefore, I stepped in and started helping collect leafs, rocks, and sticks. Once I gave the guidance I could tell that their imagination took off and they really started to enjoy themselves outside. This example of myself having to help my group get started on their project really helped me to understand how some students need that support and how easy it can be to give them. Obviously every student is going to be different but this just made me realize that some students do just need help getting started and then they can take on the project from there. I had no expectations going into Take Me Outside Day. I have never experienced this so I was very excited to see what was going to happen and how the students would like how they spent their afternoon.
Once we were done creating our animals and people, we headed back to Gordon Terrace Elementary School. This is where the students got to look at the pictures we took of their creations and the students showed the student teacher candidates how to use Seesaw. We did not have a lot of time to watch them play on Seesaw but the students did show us how to upload these pictures of their creations on their accounts, and then they showed us how you can draw on Seesaw but we did not have enough time to watch them finish their drawings. Seesaw is a huge benefit for parents, they get to see what their children are doing during school and then they have a photo copy of all assignments that their child has created.
So What?
I think that it is super important that students are able to take on their own projects on their own. Some students, as I learned, are going to need help getting started. I think that a small nudge or a little bit of help for these younger students really encourages them to be independent. I also think that Take Me Outside Day was a good example on how students look forward to days where they are not so structured and how they get creativity freedom away from the classroom. Something that I also saw during my time with my group was that this type of learning with young students encourages engagement and allowed the students to collaborate with each other. This experience links to my personal development by understanding that being patient and being adaptable to students needs builds my emotional intelligence and strengthens my ability to connect with my future students at their level. This experience links to my professional development by allowing me to practice my classroom management in an outdoor setting with smaller groups. This is also developing my language when I am around students and what I can ask them so that they are encouraged to be creative. Additionally, learning Seesaw with the students contributes to my digital literacy. This experience connects to my academic development by gaining insights into differentiated instruction for students.
Now What?
As a teacher candidate, I think that this experience was great for the students and for my cohort and I to see what outdoor learning can look like. Something that I would like to do as a result of my experience would be to integrate this into my future classroom and to bring in other subject outdoors. I think that for Take Me Outside Day it would be super cool to have the class outdoors all day. I know that this would be challenging but I think that there could be some activities that you could do that would cover majority of the school subjects. A draw back to this could be age, and if there are students in the class who don’t do well when their daily routines are switched.
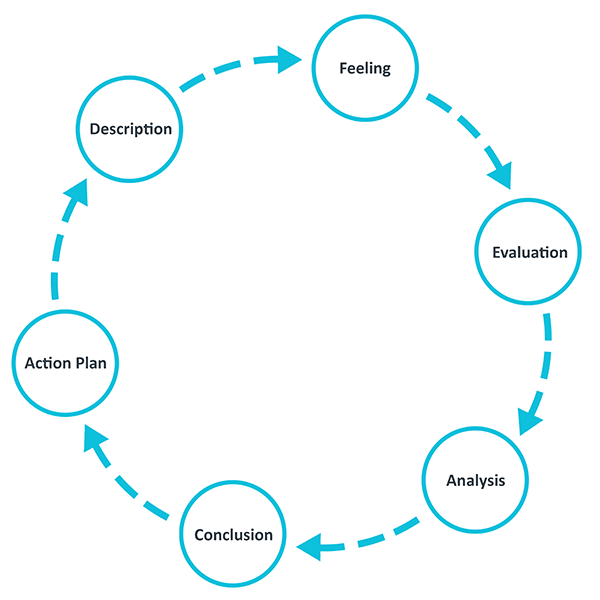
The Gibbs Reflective Cycle is six stages of where you explore an experience. I am going to do the Gibbs Reflective Cycle with this experience using Canva!
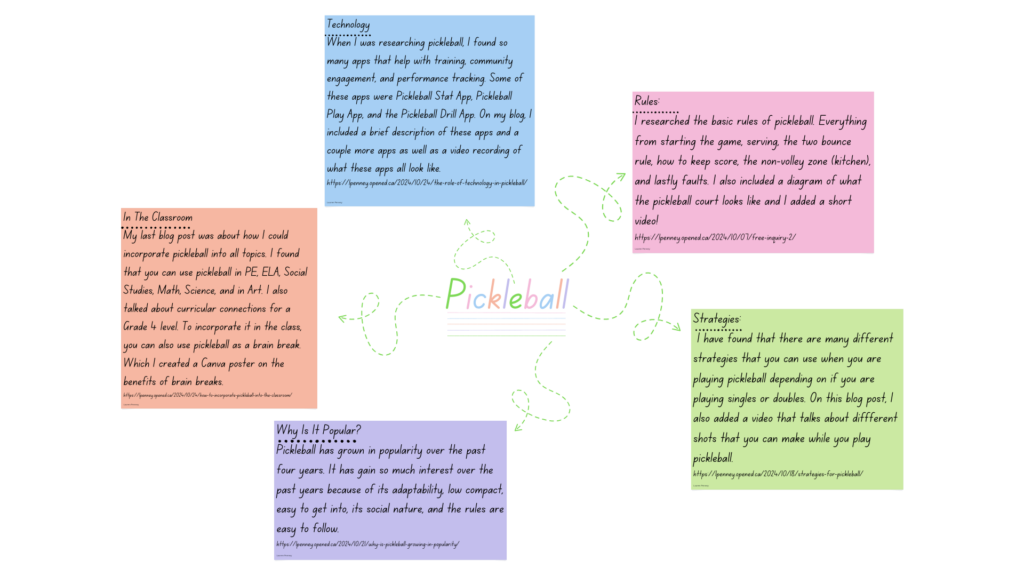
This post wraps up my free inquiry research project on pickleball. Exploring pickleball as my free inquiry project has been so much fun. I’ve enjoyed learning more about the rules, different strategies, how technology can be incorporated in pickleball, why pickleball is getting so popular, how to incorporate pickleball into the classroom, and even where pickleball gets its name from. This project has made me think critically of how I can bring pickleball into the classroom and how it can be used as more than just a game in Physical Education. I hope everyone enjoyed my free inquiry project just as much as I did!
Pickleball is great for younger students and all students because the paddle is light weight and the courts are small allowing students to cover the court easily. The rules are also simple to follow making it easier for younger grades to participate. There are many ways that you could incorporate pickleball into an elementary classroom but you could even incorporate it into outside curricular’s like intramural’s or school teams.
To incorporate pickleball in school you could…
Use it in Physical Education by teaching skills like coordination, teamwork, and agility through drills like relay races, target practice, or even as simple as practicing hitting a ball with a paddle. You could incorporate these skills through stations. After the stations, you could walk the class down to pickleball courts to play pickleball. In Grade 4, the BC Curriculum for gym content, it says “proper technique for fundamental movement skills, including non-locomotor, locomotor, and manipulative,” which pickleball includes all of the non-locomotor, locomotor, and manipulative skills. Pickleball, includes balancing, bending, twisting, running, jumping, bouncing, catching, striking and throwing. This video can give you ideas on what activities or drills you can do with younger students.
You could incorporate pickleball in Math by exploring geometry and angles by watching the trajectories of the pickleball shots. For younger grades, you could use pickleball to practice counting, or counting by twos. Or you could create word problems like: Sarah and Sam were counting how many times they were able to pass the pickleball back and forth and they both counted 42 times. If Sarah started with the pickleball and passed it to Sam, who ended with the pickleball? Additionally, at the Grade 4 level, you could incorporate pickleball into the classroom by working on perimeter or line symmetry.
Incorporating pickleball in Science by exploring the principles of physics. Or you could talk about the positive benefits that pickleball has on your body. At the Grade 4 level, to include pickleball into your science class, you could talk about energy and how there are many forms of energy, but mainly focus on kinetic energy.
For English Language Arts, depending on the age, you could create writing assignments about the rules, history, or famous pickleball players. You could also create an assignment where younger students write 1-3 sentences or words of why they liked or did not like pickleball. Depending on the age, you could also get the students to write how they played pickleball and describe some of the rally’s that they had using the correct terminology. In any grade, you can work on metacognitive strategies (which is reflecting, questioning, goal setting, and self evaluating).
For Social Studies, you could incorporate pickleball by exploring the origins of pickleball and its growth around the world. In a Grade 4 level, students can do research on a computer and create a timeline about major events that have happened in pickleball.
You could incorporate Art by making the students design their own pickleball paddle or create posters around the school to promote future pickleball clubs. Here is a website that I have found that gives you an idea on how you could create your own paddle with wood but you could also do this with cardboard! Here are some templates that I got from Alamy.com! At a Grade 4 level, the students would work on visual arts and the element of designs. Some examples of these customized pickleball paddles look like this:
I just quickly created an example of what this template could look like for a student. If it was younger students creating their own pickleball paddle, I would allow them to draw on their own or do something with a prompt like “everyone write down three feelings you felt after pickleball” and then I would hand out the template and they would draw these three feelings. For older students you could get them to do the same but write a paragraph on how they felt before giving them the template.
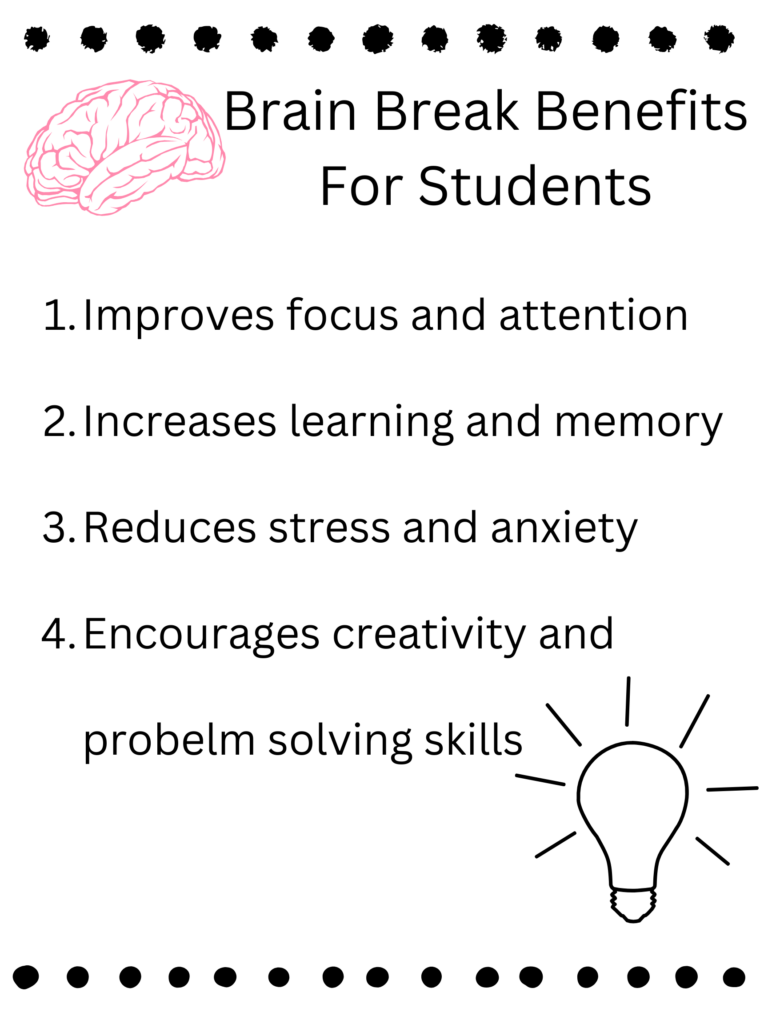
Pickleball could also be used as a brain break for the students and that could tie into a conversation about how sports and getting physical activity can give us a learning break which is super beneficial.
I created this poster through Canva, and the information is from Why Edify!
For this weeks’ inquiry post, I am going to be talking about different apps that you can download for pickleball. The categories of apps I will be talking about will be training apps, community engagement apps, and performance tracking apps.
Training App:
Pickleball Drill app features multiple drills for many different skill levels. There are drills for people who want to practice by themselves or with a partner. The app includes video demonstrations that can be done at home or at a pickleball court. The Pickleball Drill app is free and it has so much information. You can also check out their TikTok page to see what they are all about or if you want to do any drills without downloading the app! Also check out the screen recording I did of the app!
Community Engagement Apps:
Pickleball Play is an app designed to connect players to courts, events, and even clubs. It is a free app which gives you options to purchase more features. You have an option to allow the app, Pickleball Pay, to use your location so that it can use that information to find the closest pickleball courts, players, and clubs near you.
Pickle Heads is an app that is the official USA court and game finder. Therefore, if you are going on a trip in the USA and want to get some exercise, I recommend having this app to go find yourself a court or even a game to join! The Features of Pickle Heads is that you can discover local games and recruit players nearby, and you can organize playtimes and communicate with others on the app. The app also has information about courts and games in Canada! Pickle Heads also includes performance tracking features which generates matchups, and collects the scores.
Both of these apps are awesome platforms to create new friends and to get to know your community around you. I screen recorded what these apps look like but, I am not getting into depth with them due to privacy reasons! Remember, they are both free so definitely check them out!
Pickleball Play App Recording:
Pickle Heads recording is above!
Performance Tracking Apps:
Unforced Pickleball App provides data designed for pickleball players. It records and uploads games, tracks various stats such as the winner of the match, errors, serve depth, dinks, and it offers insight tailored to different skill levels. This app is free with optional in-app purchases for additional features and more analyses. Check out the screen recording video to see all of the apps features!
Pickleball Stat App focuses more on accuracy percentages and it analyzes your game. This app is free and it is for more of a serious type of pickleball player. On this app, you can create a game and keep score all in the same app. Check out the screen recording to get a better visual of the app!
Unforced Pickleball App Recording:
Pickleball stats App:
There are so many other pickleball apps, but these are ones that I have found that are free and that I think would benefit your pickleball game. Using apps for pickleball allows you to connect to your community, have organized games, makes it easier to find someone that is at the same level as you, gives you so many resources on how you can improve your game, and it enhances enjoyment and your competitiveness.
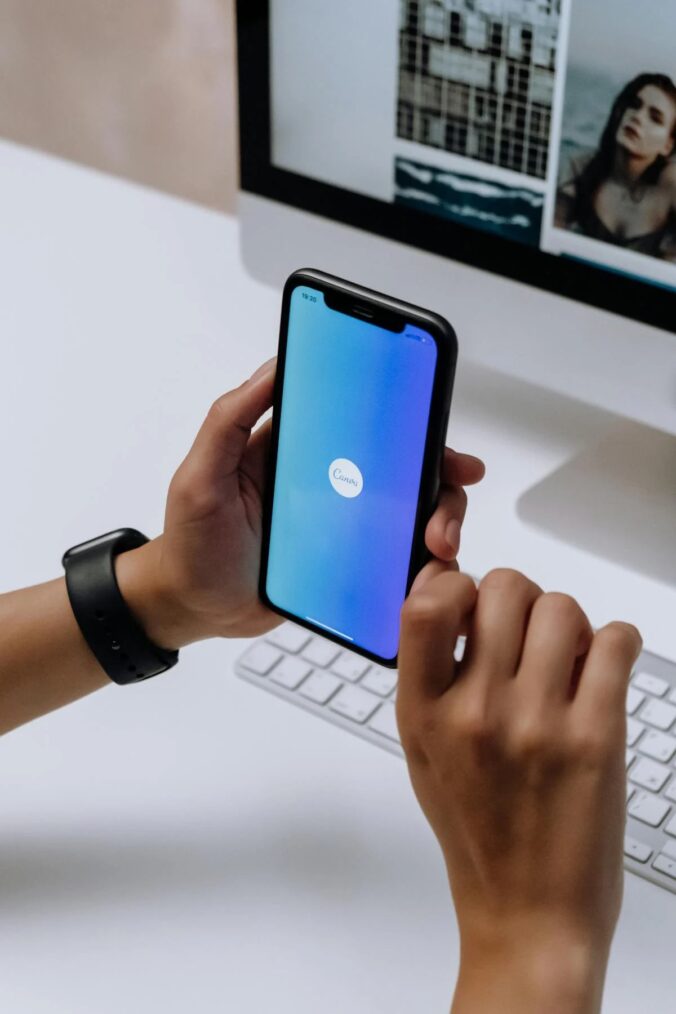
This week during class we had to create a graphic creation through one of these platforms: Canva, Edwordle, Vectr, and Pixlr.
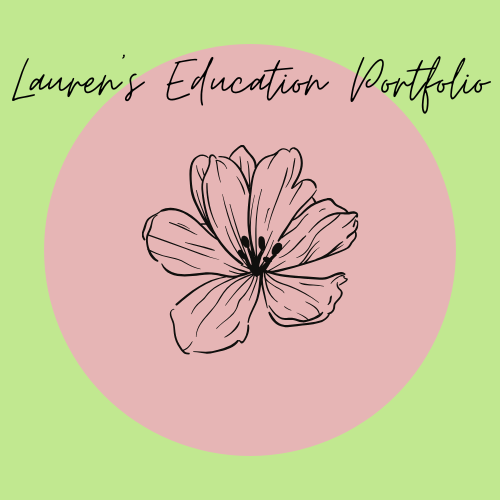
The platform I used to create my graphic creation was Canva, and I created a logo for my website. I decided to not use a template so that I could see how creative I could be while using the free version of Canva. Canva Pro gives you many more options but free Canva is just as beneficial. I have never used Canva before but I have heard a lot of people rave about it, therefore my expectations were high and honestly, Canva met them. I was really impressed with how much editing and personalization you could do on the website/app. The logo I created looks like this!
Using Canva for a graphic creation matters because it can enhance visual communication skills in the classroom. Allowing myself to create on Canva helped me promote my creativity and personality into expressing my ideas visually which could also be very beneficial to my future students. My experience with Canva has allowed me to gain experience which can be applied into multiple educational purposes and resources. Canva can enhance my experience as a teacher candidate by increasing student engagement and improving learning outcomes in my future classroom. Lastly, Canva helps my personal growth by allowing me to step outside of my comfort zone by encouraging my creativity and confidence in my graphic creating abilities.
Having this experience with Canva is going to allow me to create many things for my future classroom. It will allow me to customize student name tags for my future students coat hooks and their desks. It will also allow me to create class posters and worksheets for lessons. Depending on the grade level it can encourage students to create their own colourful posters or presentations using Canva for Students. Or even I could make these presentations to introduce new topics or even create one large day plan. As a teacher you can make calendars, weekly schedules, daily schedules, or even lesson plans on Canva while incorporating charts, pictures, to make the plans easier to follow. Additionally, I could create emergency sub plans using Canva templates ensuring clear instructions and activities for the substitute teacher.
Somethings to be aware before allowing students to use Canva is to always let their guardians know what is happening and why they will be using this platform. Additionally, before anyone uses Canva, they should be aware about copyright and licensing agreements. A drawback about Canva is that there are limited features in the free version but that should not stop you from trying Canva.
Graphic creation can be implemented in the classroom in many ways. I could see myself using graphic creations as a concrete tool for visual and interactive learning materials, it could be used for student created projects, as well as classroom management tools like daily schedules, themes for bulletin boards, or project instructions. Something that I am going to do now is experiment with Canva and other apps such as EdWordle, Vectr, and Pixlr. I will apply my new skill of graphic creation by designing engaging materials for students, while also using Canva for planning and organizing classroom activities visually.
Pickleball has been around since the 1960s, so why is there a huge increase in growth throughout the last couple of years? In this post, we will explore how pickleballs inclusive nature, adaptability, and sense of community have made it such a popular sport for all ages.
Sport for Everyone:
Mostly everyone can play pickleball. When I go and play pickleball, I see people on the courts of all ages. I see some kids who are around the age of 5 years old and I have also seen and met people who are around 65 years old on the courts. I have also seen many generations in families play together!
Adaptable for All Abilities:
Pickleball is very adaptable and it is for all people with different abilities. For instance, there is wheel chair pickleball. This allows people with different physical abilities to play the game. The rules of wheel chair pickleball are similar, but there are a few changes like:
The ball is allowed to bounce twice before you returning the ball to the other side of the court.
The court size is recommended to be smaller than the standard pickleball court, although, in a wheel chair you can play on a regular sized court or a smaller court.
There are more rules of pickleball for those in wheelchairs, if you want to check it out watch this video!
Low-Impact, Community, and Room for Growth in Pickleball:
Compared to any other sport, pickleball is very low compact and a low chance of injury. As a player, you get to choose the pace of the game and you get to decide how hard you want to push yourself. It is also a great way for all ages to get out and meet new people while getting some exercise. In this game, there is always space for growth and improvement which is why I personally think that pickleball has increased in popularity over the years because its easy to be good at it but its hard to become an expert.
Affordable and Accessible:
Pickleball is very easy to get into! All you need is a racket and a pickleball. A pickleball is the same as a whiffle ball but it has more holes and it bounces better. The average cost of a paddle is around $65 CAD and normally that includes a pickleball. Buying a two pack of paddles is more economical, rather than just buying a single paddle. Buying a two pack of paddles also makes it easier for your friends and family members to join in on a game.
Since the rise of pickleball, many cities have created pickleball courts in each community. Therefore, they are easy to find and it is an easy way to keep up with your exercise.
Simple Rules, Easy to Learn:
Pickleball rules are very straightforward, making it easier for beginners and younger children to learn the basics. If you need a reminder of the rules or would like to learn the rules, check out my blog post Pickleball Rules!
BuildingCommunity:
Just like every other sport, pickleball is a social and it brings so many people together in a community. It is a fantastic way for people, especially seniors, to make new friends in and around their community. Pickleball is also a fun sport where there are many indoor and outdoor leagues depending on the weather so it can be all year round!